Love this? Save it for later!
Share the inspiration with your friends
“You’ve gotta try this,” my neighbor texted one humid July afternoon, right as the sun was turning the sidewalks into miniature ovens. Honestly, I was skeptical—homemade ice cream isn’t usually my go-to, especially when it comes to something as flashy as a red, white, and blue dessert. But curiosity got the best of me, and I found myself in my kitchen, whisking together a creamy red white and blue ice cream recipe that turned out to be unexpectedly soothing in the chaos of summer heat.
The first spoonful hit me with cold, creamy bliss, but it was the subtle tang from the berries and the smooth vanilla swirl that made me pause. It reminded me of slow evenings on the porch, fireworks crackling in the distance, and the kind of simple joy that doesn’t need a fancy occasion. This ice cream became my little weekend ritual, something I made over and over (sometimes twice a week, no joke), because it felt like summer captured in a bowl—patriotic but never over the top.
What stuck with me most was how easy it was: no complicated churners or weird ingredients, just classic flavors that come together and taste like a celebration waiting to happen. I’ve since made it for friends, who always ask for the recipe, and it has quietly become a staple dessert when the grill is fired up and the playlist is humming. It’s not just a dessert; it’s that cool moment of pause when everything slows down, and you get to savor something truly creamy and comforting in red, white, and blue.
Why You’ll Love This Recipe
This creamy red white and blue ice cream recipe is honestly one of those treats that feels fancy but is totally down-to-earth. After testing it multiple times (because I’m that person who tweaks recipes until they feel just right), I can say it’s a crowd-pleaser that brings a little magic without the fuss.
- Quick & Easy: Comes together in under 30 minutes, perfect for last-minute patriotic celebrations or cooling off on a sunny afternoon.
- Simple Ingredients: No need for specialty stores—just basics you probably already have in your kitchen like cream, sugar, and fresh berries.
- Perfect for Summer Parties: Great for 4th of July cookouts, backyard hangouts, or anytime you want a festive dessert that’s light but indulgent.
- Crowd-Pleaser: Kids love the colorful layers, and adults appreciate the balance of creamy vanilla with fresh berry tang.
- Unbelievably Delicious: The texture is silky smooth, thanks to a little trick of folding whipped cream into the base for that rich mouthfeel without heaviness.
What sets this recipe apart is the layering technique that keeps the colors vibrant and distinct, giving each bite a little surprise of flavor. Plus, I use a splash of lemon juice in the berry puree to brighten things up, which honestly makes all the difference. It’s not just an ice cream; it’s a sweet, creamy celebration that feels homemade and heartfelt. If you’ve ever tried a classic Neapolitan cake, you’ll appreciate how this ice cream pulls the same nostalgic vibes but with a fresh summer twist.
What Ingredients You Will Need
This recipe uses simple, wholesome ingredients to deliver bold flavor and satisfying texture without the fuss. The red, white, and blue theme comes from fresh fruit and classic vanilla—nothing complicated, just pure, honest ingredients that make this homemade ice cream stand out.
- For the Vanilla Ice Cream Base:
- 2 cups heavy cream (I like using Organic Valley for its rich texture)
- 1 cup whole milk (room temperature)
- ¾ cup granulated sugar (adjust to taste)
- 1 tablespoon pure vanilla extract (don’t skip the real stuff!)
- Pinch of salt (balances the sweetness)
- For the Red Layer (Strawberry Puree):
- 1 cup fresh strawberries, hulled and chopped
- 2 tablespoons sugar
- 1 teaspoon lemon juice (brightens the flavor)
- For the Blue Layer (Blueberry Puree):
- 1 cup fresh or frozen blueberries (if frozen, thaw first)
- 2 tablespoons sugar
- 1 teaspoon lemon juice
- Optional:
- Fresh blueberries and sliced strawberries for garnish (adds a fresh crunch)
Feel free to swap the berries with frozen ones if fresh aren’t in season—just drain any excess liquid to keep the ice cream creamy. For a dairy-free version, I’ve had success using coconut cream instead of heavy cream, but you’ll want to skip the milk or use a nut milk for the base. This recipe pairs nicely with other summer desserts like the creamy classic cheesecake, making it a versatile star at any gathering.
Equipment Needed
Making this creamy red white and blue ice cream is straightforward, but a few kitchen tools will make the process smoother. Here’s what you’ll want on hand:
- Ice cream maker (preferably one with a freezer bowl) — if you don’t have one, no worries; I’ll share an alternative method below.
- Blender or food processor for pureeing the berries (a hand blender works well too).
- Mixing bowls (medium and large sizes).
- Whisk and spatula for folding ingredients together.
- Fine mesh sieve (optional but helpful to strain berry seeds for a silky texture).
- Freezer-safe container for layering and storing the ice cream.
I personally love using my Cuisinart ice cream maker because it churns evenly and is easy to clean. If you’re on a budget, brands like Hamilton Beach offer reliable, affordable options. And if you want to skip the ice cream maker, you can freeze the mixture in layers, stirring every 30 minutes until firm (though it won’t be quite as smooth). Keeping your equipment cold and clean really helps the ice cream texture—just a little tip from many summer ice cream attempts.
Preparation Method
- Prepare the Berry Purees (15 minutes): In a blender or food processor, combine strawberries with 2 tablespoons sugar and lemon juice. Blend until smooth. Repeat with blueberries and their sugar and lemon juice. For a smoother texture, strain each puree through a fine mesh sieve to remove seeds. Set aside.
- Make the Vanilla Ice Cream Base (10 minutes): In a large bowl, whisk together heavy cream, whole milk, granulated sugar, vanilla extract, and a pinch of salt. Whisk until sugar is dissolved and mixture is well combined. Chill the base in the fridge for 10-15 minutes to help it thicken slightly (this step helps with texture and churn).
- Churn the Ice Cream (20-25 minutes): Pour the chilled vanilla base into your ice cream maker. Churn according to manufacturer’s instructions until it reaches a soft-serve consistency. This usually takes about 20-25 minutes.
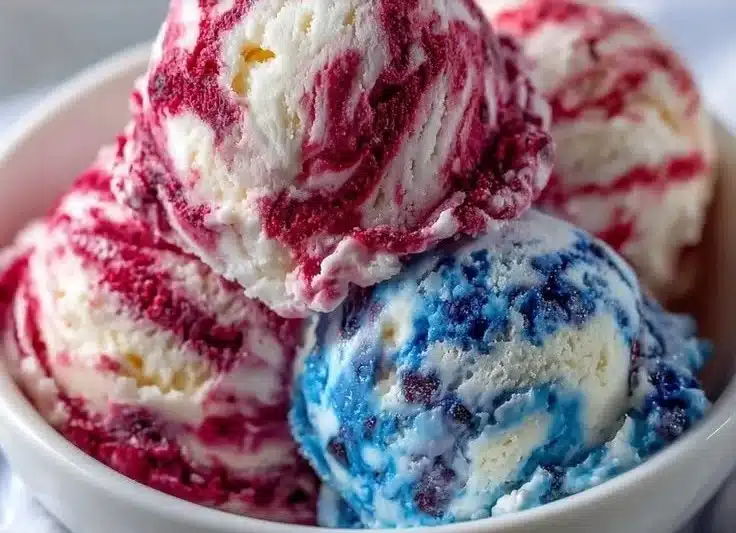
- Layer the Ice Cream and Purees (10 minutes): In a freezer-safe container, start by spooning a layer of vanilla ice cream. Next, swirl in a layer of strawberry puree, then add another layer of vanilla. Follow with a blueberry puree layer and repeat layering until all components are used. Use a spatula or knife to gently swirl the layers together, taking care not to overmix—you want those pretty red, white, and blue ribbons.
- Freeze Until Firm (4-6 hours): Cover the container tightly and freeze for at least 4 hours, preferably overnight. The ice cream will firm up to a perfect scoopable texture.
- Serve: When ready to enjoy, let the ice cream sit at room temperature for 5-10 minutes to soften slightly for easiest scooping. Garnish with fresh berries if desired.
Keep an eye on the texture during churning—if it seems too soft or too icy, a quick stir or adjusting the freezer time can do wonders. When I first tried this recipe, I forgot to chill the base and ended up with a slightly icy texture—lesson learned! Also, layering the purees while the ice cream is still soft helps keep those vibrant colors from running together. This recipe shares that crowd-pleasing, creamy vibe you get with a well-made creamy pesto gnocchi, but for dessert.
Cooking Tips & Techniques
Working with homemade ice cream can feel intimidating, but a few insider tips can make your creamy red white and blue ice cream turn out just right every time.
- Chill Everything: Cold ingredients and a chilled ice cream maker bowl help the mixture freeze faster and smoother. I usually pop my mixing bowl in the fridge while prepping the purees.
- Strain the Purees: Removing seeds from strawberries and blueberries gives a silky texture that’s way more enjoyable. It’s a little extra step but worth it.
- Don’t Overmix the Layers: When swirling the purees into the vanilla base, gentle folds keep the colors distinct. Overmixing will blend them into a purple mess—been there, done that.
- Use Fresh or Thawed Fruit: Frozen berries work fine but drain any excess juice so your ice cream doesn’t become too watery.
- Patience Is Key: Let the ice cream firm up fully in the freezer before scooping. It’s tempting to dig in early, but waiting makes a world of difference.
When I first made this recipe, I skipped straining the berry puree and ended up picking seeds out of my ice cream. Not fun! Also, timing the freezing with your party plans is crucial—this dessert is best enjoyed fresh but can hold up well in the freezer for several days. Multitasking is easy here; you can prep the purees while marinating chicken for a backyard cookout (like the smoky charred shrimp I made last summer), making it a stress-free addition to your menu.
Variations & Adaptations
This creamy red white and blue ice cream recipe is flexible, letting you play with flavors, dietary needs, and presentation.
- Dairy-Free Version: Use coconut cream in place of heavy cream and almond or oat milk for whole milk. The texture will be slightly different but still delicious and creamy.
- Alternative Berries: Swap strawberries and blueberries for raspberries and blackberries for a tart twist. Or try frozen mixed berries if fresh aren’t available.
- Added Texture: Fold in crushed graham crackers or white chocolate chips for a little crunch. I once added blueberry swirl cheesecake bites to the mix for a decadent treat.
- Healthier Option: Use Greek yogurt instead of cream for a tangy, lighter ice cream. It’s a nice balance if you want a treat without the heaviness.
- Non-Ice Cream Maker Method: Freeze the vanilla base in a shallow dish, stirring every 30 minutes while layering the purees to mimic the swirl effect.
Personally, I’ve tried layering this ice cream in popsicle molds for a fun handheld version—great for kids’ parties or a picnic. Each variation has its charm, but I find the original recipe still wins for that classic creamy texture and patriotic flair.
Serving & Storage Suggestions
Serve this creamy red white and blue ice cream chilled but slightly softened—about 5-10 minutes at room temp—to get those perfect scoops. Presentation-wise, a clear glass bowl or layered parfait glasses really show off the vibrant colors and make it feel extra special.
This ice cream pairs beautifully with grilled desserts or light summer cakes. If you’re planning a full summer feast, it complements smoky mains like the crispy ultimate BBQ chicken grilled cheese sandwich or a fresh fruit salad for a balanced meal.
Store leftovers in an airtight container in your freezer. For best flavor and texture, consume within 5 days. When reheating, let it thaw slightly at room temperature rather than microwaving, which can ruin the creamy texture. Flavors tend to deepen overnight, so making this a day ahead can actually improve the experience.
Nutritional Information & Benefits
Per serving (approximate): 250 calories, 18g fat, 20g carbohydrates, 3g protein.
This ice cream recipe uses real fruit, bringing antioxidants and vitamins like vitamin C from strawberries and blueberries. The dairy provides calcium and some protein, making it a more balanced treat compared to typical store-bought options loaded with artificial flavors and preservatives.
For those watching carbs or dairy intake, the recipe is adaptable with dairy-free creams and sugar substitutes. Just keep in mind that texture and sweetness may vary slightly. I love that this dessert feels like indulgence but can be tweaked to fit different dietary needs without losing its soul.
Conclusion
Making this creamy red white and blue ice cream recipe became more than just a summer project—it turned into a tradition of flavors and memories. It’s the kind of dessert that brings people together, whether you’re chilling after a long day or hosting a festive get-together.
The best part? It’s easy enough to make on a whim but impressive enough to serve at any party. You can customize it to your taste and dietary preferences, making it a go-to that’s both personal and satisfying. Honestly, I keep coming back to this recipe because it’s that rare blend of simple ingredients and big flavor that feels like a little celebration in every scoop.
If you try it, I’d love to hear how you made it your own or what occasion made it special for you. After all, sharing recipes is how these stories keep growing—and the next time you want a creamy, patriotic dessert, you’ll have this one in your back pocket.
FAQs
Can I make this ice cream without an ice cream maker?
Yes! You can freeze the vanilla base in a shallow dish and stir every 30 minutes, layering the berry purees between stirs to create the red, white, and blue effect. It won’t be as smooth but still tasty.
Can I use frozen berries instead of fresh?
Absolutely. Just thaw them first and drain any excess liquid to keep the ice cream from becoming watery.
How long can I store this ice cream in the freezer?
Store it in an airtight container for up to 5 days for best flavor and texture.
Is there a vegan version of this recipe?
Yes, substitute coconut cream for heavy cream and use plant-based milk for the whole milk. The texture will vary but remains delicious.
Can I add mix-ins like chocolate chips or nuts?
Definitely! Fold in your favorite mix-ins during the layering step for added texture and flavor.
Pin This Recipe!
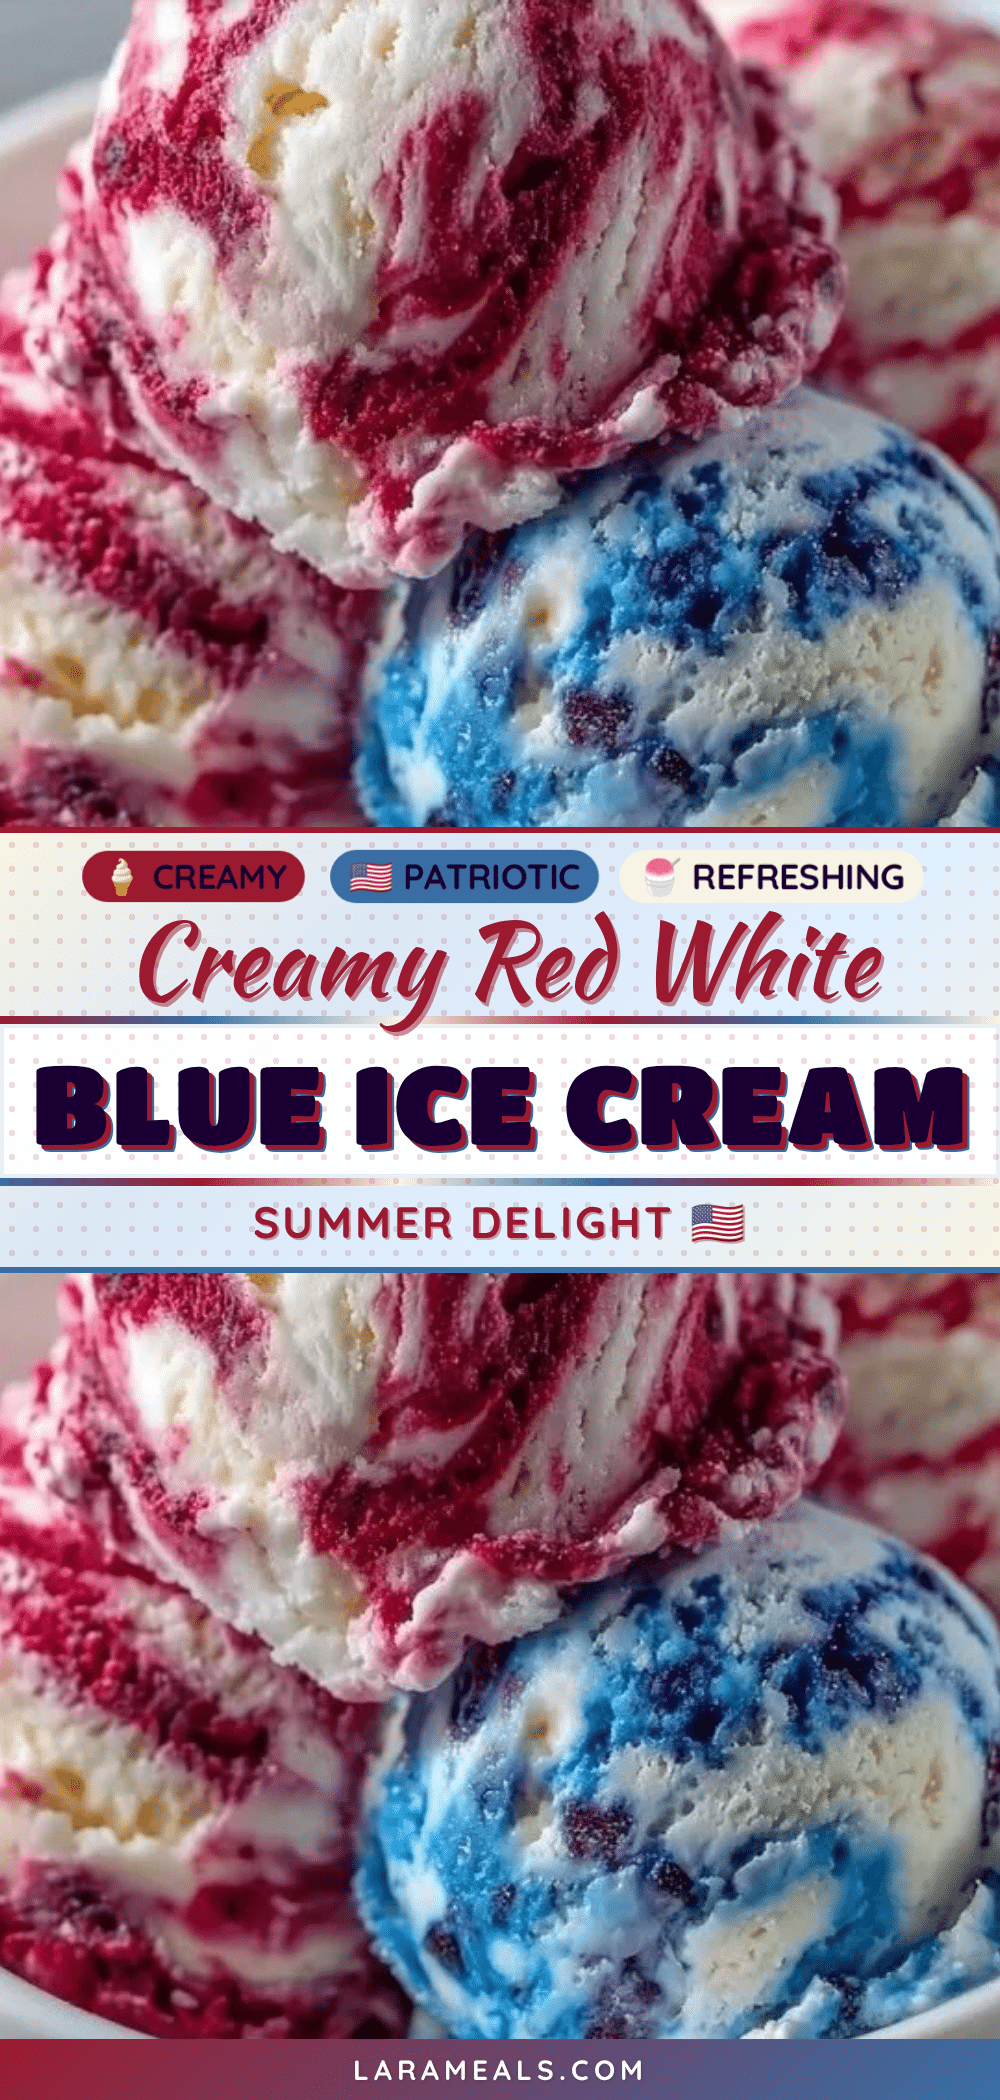
Creamy Red White and Blue Ice Cream Recipe Easy Homemade Patriotic Dessert
A quick and easy homemade ice cream recipe featuring vibrant layers of strawberry and blueberry purees swirled into a creamy vanilla base, perfect for patriotic celebrations and summer parties.
- Prep Time: 25 minutes
- Cook Time: 20-25 minutes
- Total Time: 5 hours 10 minutes
- Yield: 8 servings 1x
- Category: Dessert
- Cuisine: American
Ingredients
- 2 cups heavy cream
- 1 cup whole milk (room temperature)
- 3/4 cup granulated sugar (adjust to taste)
- 1 tablespoon pure vanilla extract
- Pinch of salt
- 1 cup fresh strawberries, hulled and chopped
- 2 tablespoons sugar (for strawberry puree)
- 1 teaspoon lemon juice (for strawberry puree)
- 1 cup fresh or frozen blueberries (if frozen, thaw first)
- 2 tablespoons sugar (for blueberry puree)
- 1 teaspoon lemon juice (for blueberry puree)
- Optional: fresh blueberries and sliced strawberries for garnish
Instructions
- Prepare the Berry Purees (15 minutes): In a blender or food processor, combine strawberries with 2 tablespoons sugar and lemon juice. Blend until smooth. Repeat with blueberries and their sugar and lemon juice. For a smoother texture, strain each puree through a fine mesh sieve to remove seeds. Set aside.
- Make the Vanilla Ice Cream Base (10 minutes): In a large bowl, whisk together heavy cream, whole milk, granulated sugar, vanilla extract, and a pinch of salt. Whisk until sugar is dissolved and mixture is well combined. Chill the base in the fridge for 10-15 minutes to help it thicken slightly.
- Churn the Ice Cream (20-25 minutes): Pour the chilled vanilla base into your ice cream maker. Churn according to manufacturer’s instructions until it reaches a soft-serve consistency.
- Layer the Ice Cream and Purees (10 minutes): In a freezer-safe container, start by spooning a layer of vanilla ice cream. Next, swirl in a layer of strawberry puree, then add another layer of vanilla. Follow with a blueberry puree layer and repeat layering until all components are used. Use a spatula or knife to gently swirl the layers together, taking care not to overmix.
- Freeze Until Firm (4-6 hours): Cover the container tightly and freeze for at least 4 hours, preferably overnight.
- Serve: Let the ice cream sit at room temperature for 5-10 minutes to soften slightly for easiest scooping. Garnish with fresh berries if desired.
Notes
Chill all ingredients and equipment for best texture. Strain berry purees to remove seeds for a silky smooth ice cream. Do not overmix layers to keep colors vibrant. Frozen berries can be used if thawed and drained. For dairy-free version, substitute coconut cream and plant-based milk. Without an ice cream maker, freeze the base in a shallow dish and stir every 30 minutes while layering purees.
Nutrition
- Serving Size: 1/2 cup
- Calories: 250
- Fat: 18
- Carbohydrates: 20
- Protein: 3
Keywords: ice cream, homemade ice cream, patriotic dessert, red white and blue, summer dessert, berry ice cream, vanilla ice cream, easy ice cream recipe


