Love this? Save it for later!
Share the inspiration with your friends
“Are you sure this will hold up?” my friend asked skeptically, eyeing the colorful layers of my no-bake flag cheesecake bars wobbling slightly on the counter. Honestly, I wasn’t sure either when I first whipped this up. I’d been scrambling to put together a quick, festive dessert for a backyard Independence Day picnic, and truth be told, the oven was already working overtime with other dishes. I figured, why not try something simple, no-bake, and visually fun? The result was a surprise hit. The creamy cheesecake layers, the vibrant berries arranged in a flag pattern—it was festive, refreshing, and no one believed it came together without heating the oven once. Since then, these bars have become my go-to for any celebratory occasion where I want something sweet but fuss-free. They’re the kind of recipe you can make in under an hour, with just a bit of chilling time, and they always get asked for again (and again). There’s something comforting about how the cool, tangy cheesecake meets the sweet bursts of fresh fruit, all atop a buttery graham cracker crust. It’s like a sweet little celebration in every bite.
What stuck with me is how easy and joyful this recipe is to make—it’s perfect for those moments when you want to impress without stress. Plus, the flag design adds a bit of whimsy that’s hard to resist. So, if you ever find yourself needing a quick festive dessert, this easy no-bake flag cheesecake bars recipe might just become your secret weapon, too.
Why You’ll Love This Recipe
I’ve tested this easy no-bake flag cheesecake bars recipe multiple times (probably more than I should admit) to get the texture just right—creamy, smooth, but firm enough to slice neatly. It’s honestly one of those desserts that manages to be both show-stopping and fuss-free, which is a rare combo. Here’s why this recipe deserves a spot in your recipe box:
- Quick & Easy: Ready in about 45 minutes, plus chilling, so you can whip it up even when the day’s hectic.
- Simple Ingredients: No need for specialty stores; pantry staples like cream cheese, graham crackers, and fresh berries do the trick.
- Perfect for Festive Occasions: Whether it’s the Fourth of July, Memorial Day, or any backyard party, the flag design adds that celebratory flair.
- Crowd-Pleaser: Kids and adults alike love the creamy texture combined with the fresh fruit’s natural sweetness.
- Unbelievably Delicious: The balance of tangy cheesecake, sweet berries, and buttery crust creates a flavor combo that makes you pause and savor.
What really makes these bars different from the usual no-bake cheesecakes is the layering technique and the way the berries are arranged to mimic a flag—it’s festive without feeling forced. Plus, I like to blend the cream cheese until ultra-smooth, which gives the filling a silky, almost mousse-like quality. It’s comfort food with a fresh twist, perfect for those sunny days when you want dessert but not the heat of the oven.
What Ingredients You Will Need
This recipe uses straightforward, wholesome ingredients that come together to create a bold, bright flavor and a satisfying texture—no complicated steps or rare ingredients involved. You probably have most of these already, and substitutions are easy if needed.
- For the crust:
- 1 ½ cups graham cracker crumbs (about 10 full sheets, finely crushed)
- 6 tablespoons unsalted butter, melted (I prefer Land O Lakes for richness)
- 2 tablespoons granulated sugar
- For the cheesecake filling:
- 16 ounces (450g) cream cheese, softened (room temperature for smooth mixing)
- 1 cup powdered sugar, sifted (for that silky sweetness)
- 1 teaspoon pure vanilla extract
- 1 cup heavy whipping cream, chilled (helps the filling set perfectly)
- For the flag topping:
- 1 cup fresh strawberries, hulled and sliced thin
- 1 cup fresh blueberries
- Optional: small white star-shaped sprinkles or edible stars for garnish
Ingredient Tips: For the best crust texture, finely crush the graham crackers—no big chunks here! If you want a gluten-free option, swap the graham crackers for gluten-free alternatives or finely crushed nuts mixed with a bit of sugar. I always recommend using fresh berries for the topping because frozen can get soggy and watery, which messes with the cheesecake’s texture. If strawberries aren’t in season, raspberries work well for a similar red pop.
Equipment Needed
- 8×8 inch (20×20 cm) square baking pan – you can also use a springform pan, but the square pan makes the layering easier.
- Mixing bowls – one large for the filling, one small for the crust ingredients.
- Electric mixer or stand mixer – this helps get the cream cheese super smooth and the whipped cream fluffy.
- Measuring cups and spoons for accurate ingredient amounts.
- Rubber spatula – perfect for scraping down the bowl and folding whipped cream gently.
- Food processor or resealable bag and rolling pin – for crushing graham crackers finely.
- Knife and cutting board – for slicing strawberries thinly to mimic the flag stripes.
If you don’t have a food processor, no worries! Just place the graham crackers in a sturdy zip-top bag and crush them with a rolling pin or even a heavy pan. I’ve done this countless times when traveling or in a kitchen that’s not my own. Also, if you don’t have a stand mixer, a handheld electric mixer works just as well—just be patient when whipping the cream.
Preparation Method
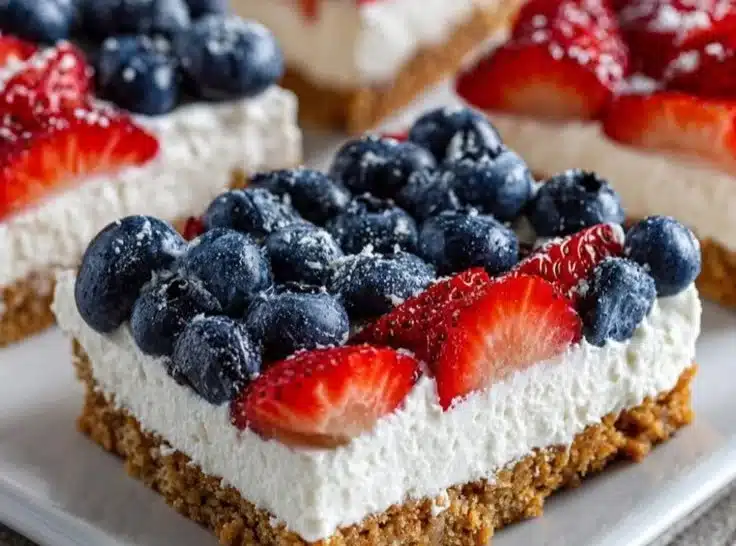
- Prepare the crust: Combine 1 ½ cups graham cracker crumbs, 6 tablespoons melted butter, and 2 tablespoons sugar in a bowl. Stir until the mixture looks like wet sand. It should hold together when pressed.
- Press crust into pan: Firmly press the crumb mixture into the bottom of your 8×8 inch pan, making an even layer. Use the bottom of a glass or measuring cup to compact it tightly. Chill in the refrigerator for at least 10 minutes while you prepare the filling.
- Make the cheesecake filling: In a large bowl, beat 16 ounces cream cheese with 1 cup powdered sugar and 1 teaspoon vanilla extract until silky smooth and free of lumps. This usually takes about 3-4 minutes on medium speed.
- Whip the cream: In a separate chilled bowl, whip 1 cup heavy cream until stiff peaks form. This usually takes 4-5 minutes. Be careful not to overbeat—it should hold shape but still look smooth.
- Fold whipped cream into cream cheese: Gently fold the whipped cream into the cream cheese mixture in 2 additions. Use a spatula and fold carefully to keep the mixture light and airy.
- Assemble the cheesecake bars: Pour half of the filling over the chilled crust, smoothing with a spatula. Arrange sliced strawberries in horizontal stripes on top of the filling, leaving space for the blueberries in the corner.
- Carefully spoon the remaining filling over the strawberries but leave the corner where the blueberries will go uncovered.
- Add blueberries: Fill the corner with whole fresh blueberries to mimic the stars area of the flag. Press them gently into the filling so they stay in place.
- Chill the bars: Refrigerate for at least 4 hours, or preferably overnight, to let the cheesecake set fully. This step is key to getting clean slices and a firm texture.
- Serve: Use a sharp knife warmed in hot water to slice the bars cleanly. Serve chilled and enjoy!
Tip: When arranging the strawberries, slice them thinly and keep the stripes as even as possible for the best visual effect. If your berries are very juicy, pat them dry gently with paper towels before placing them on the cheesecake to avoid sogginess. Also, I like to line my pan with parchment paper for easy removal, but it’s not a must.
Cooking Tips & Techniques
One of the trickiest parts of any no-bake cheesecake is getting the filling to set just right without baking. Here’s what I’ve learned from making these bars a bunch of times:
- Softened cream cheese is a must. If it’s cold and lumpy, your filling won’t be smooth. Let it sit at room temperature for at least 30 minutes before mixing.
- Whip the cream properly. Undermixing means a runny filling; overmixing makes it grainy or buttery. Watch for stiff peaks but stop right there.
- Folding is gentle work. Use a spatula to fold the whipped cream in gently to keep the airiness that makes the cheesecake light.
- Chill, chill, chill. The longer you let it set, the firmer and easier it is to slice. I usually chill mine overnight.
- Clean slicing: Dip your knife in hot water and wipe it between cuts to get neat slices without dragging berries or filling.
One time, I tried rushing the chilling and ended up with a mess of filling oozing everywhere. Learned my lesson fast! Patience here pays off. Also, if you want to get creative, layering some classic cheesecake with fresh berries inside the filling before chilling adds a nice surprise texture.
Variations & Adaptations
This easy no-bake flag cheesecake bars recipe is a great canvas to tweak based on your needs or what’s in season. Here are a few ideas I’ve tried (and loved):
- Dietary Adjustments: For a lighter version, swap half the cream cheese with Greek yogurt or use a dairy-free cream cheese and coconut cream to make it vegan-friendly.
- Seasonal Fruit Swap: Instead of strawberries and blueberries, use kiwi and mango for a tropical flag vibe or raspberries and blackberries for a darker, richer look.
- Flavor Infusion: Add a tablespoon of lemon zest to the filling for a fresh citrus kick or swirl in some strawberry puree before chilling for a marbled effect.
- Alternative Crust: Use crushed chocolate cookies or gingersnaps for a flavor twist. I once tried crushed pecans mixed with honey for a nutty base that was fantastic.
- Make it a Layered Dessert: Try layering this cheesecake filling with a layer of creamy mousse and chocolate ganache for a richer treat.
Each variation brings its own personality to the bars, so feel free to experiment—just keep the berry pattern if you want the flag look to stay festive and recognizable.
Serving & Storage Suggestions
These cheesecake bars are best served chilled straight from the fridge. I like to plate them on a simple white dish so the colors really pop. They pair wonderfully with a light iced tea or a sparkling lemonade for summer celebrations.
You can store leftover bars in an airtight container in the refrigerator for up to 4 days. If you want to keep them longer, they freeze well—just wrap tightly in plastic wrap and then foil. When you’re ready to enjoy, thaw them overnight in the fridge. The texture remains creamy and delicious, though the berries might soften slightly.
Reheating isn’t recommended since it’s a no-bake dessert, but letting them sit at room temperature for 10-15 minutes before serving can help soften the filling if it’s been chilled too long.
Flavors tend to meld beautifully after a day, making these bars even better the next day—perfect for prepping ahead of a party. Just be sure to keep the berries fresh and add any delicate garnishes right before serving.
Nutritional Information & Benefits
This easy no-bake flag cheesecake bars recipe is rich and indulgent, but with a few mindful swaps, it can fit nicely into balanced eating. A typical serving provides approximately:
| Per Serving (1 bar) | Amount |
|---|---|
| Calories | 280 |
| Fat | 18g |
| Carbohydrates | 22g |
| Protein | 4g |
| Sugar | 16g |
The cream cheese and heavy cream provide calcium and protein, while the fresh berries add antioxidants and vitamin C. Using fresh fruit instead of sugary toppings keeps the sugar content more natural and balanced. For those watching carbs, reducing the crust sugar or using almond flour crust can help lower carbs.
Since this recipe contains dairy and gluten (in the graham crackers), those with allergies should consider substitutions like gluten-free crusts and dairy-free cream cheese alternatives. Personally, I appreciate this dessert as a treat that feels festive yet not overly processed, which makes it easier to enjoy without guilt during celebrations.
Conclusion
These easy no-bake flag cheesecake bars are a wonderful way to bring a festive touch to your dessert table without the fuss of baking. They’re creamy, refreshing, and look impressive—qualities that make them a staple in my recipe rotation for celebrations. What I love most is how adaptable they are, letting you tailor flavors and ingredients to suit your style or dietary needs.
Whether you’re hosting a barbecue with friends or need a last-minute dessert that feels special, this recipe offers a delicious solution. I hope you find as much joy making and sharing these bars as I do. Don’t hesitate to tweak the fruit or crust to your liking, and if you try out any fun variations, I’d love to hear about them!
Happy celebrating and happy baking (or should I say no-baking)!
FAQs About Easy No-Bake Flag Cheesecake Bars
Can I make these bars ahead of time?
Absolutely! They actually taste better after chilling overnight, which helps the flavors meld and the filling set firmly.
What if I don’t have fresh berries? Can I use frozen?
Frozen berries tend to release more moisture and can make the bars soggy. If you must use frozen, thaw and pat them dry thoroughly before using.
How do I get clean slices without the filling sticking to the knife?
Dip a sharp knife in hot water, wipe it dry, and slice gently. Repeat warming the knife between cuts for the neatest slices.
Can I substitute the graham cracker crust with something else?
Yes! Crushed cookies like chocolate wafers or gingersnaps work well, or try a nut-based crust for gluten-free options.
Is it possible to make this recipe vegan?
With dairy-free cream cheese and coconut cream whipped instead of heavy cream, plus a vegan crust, you can create a vegan version. The texture will be slightly different but still delicious!
Pin This Recipe!
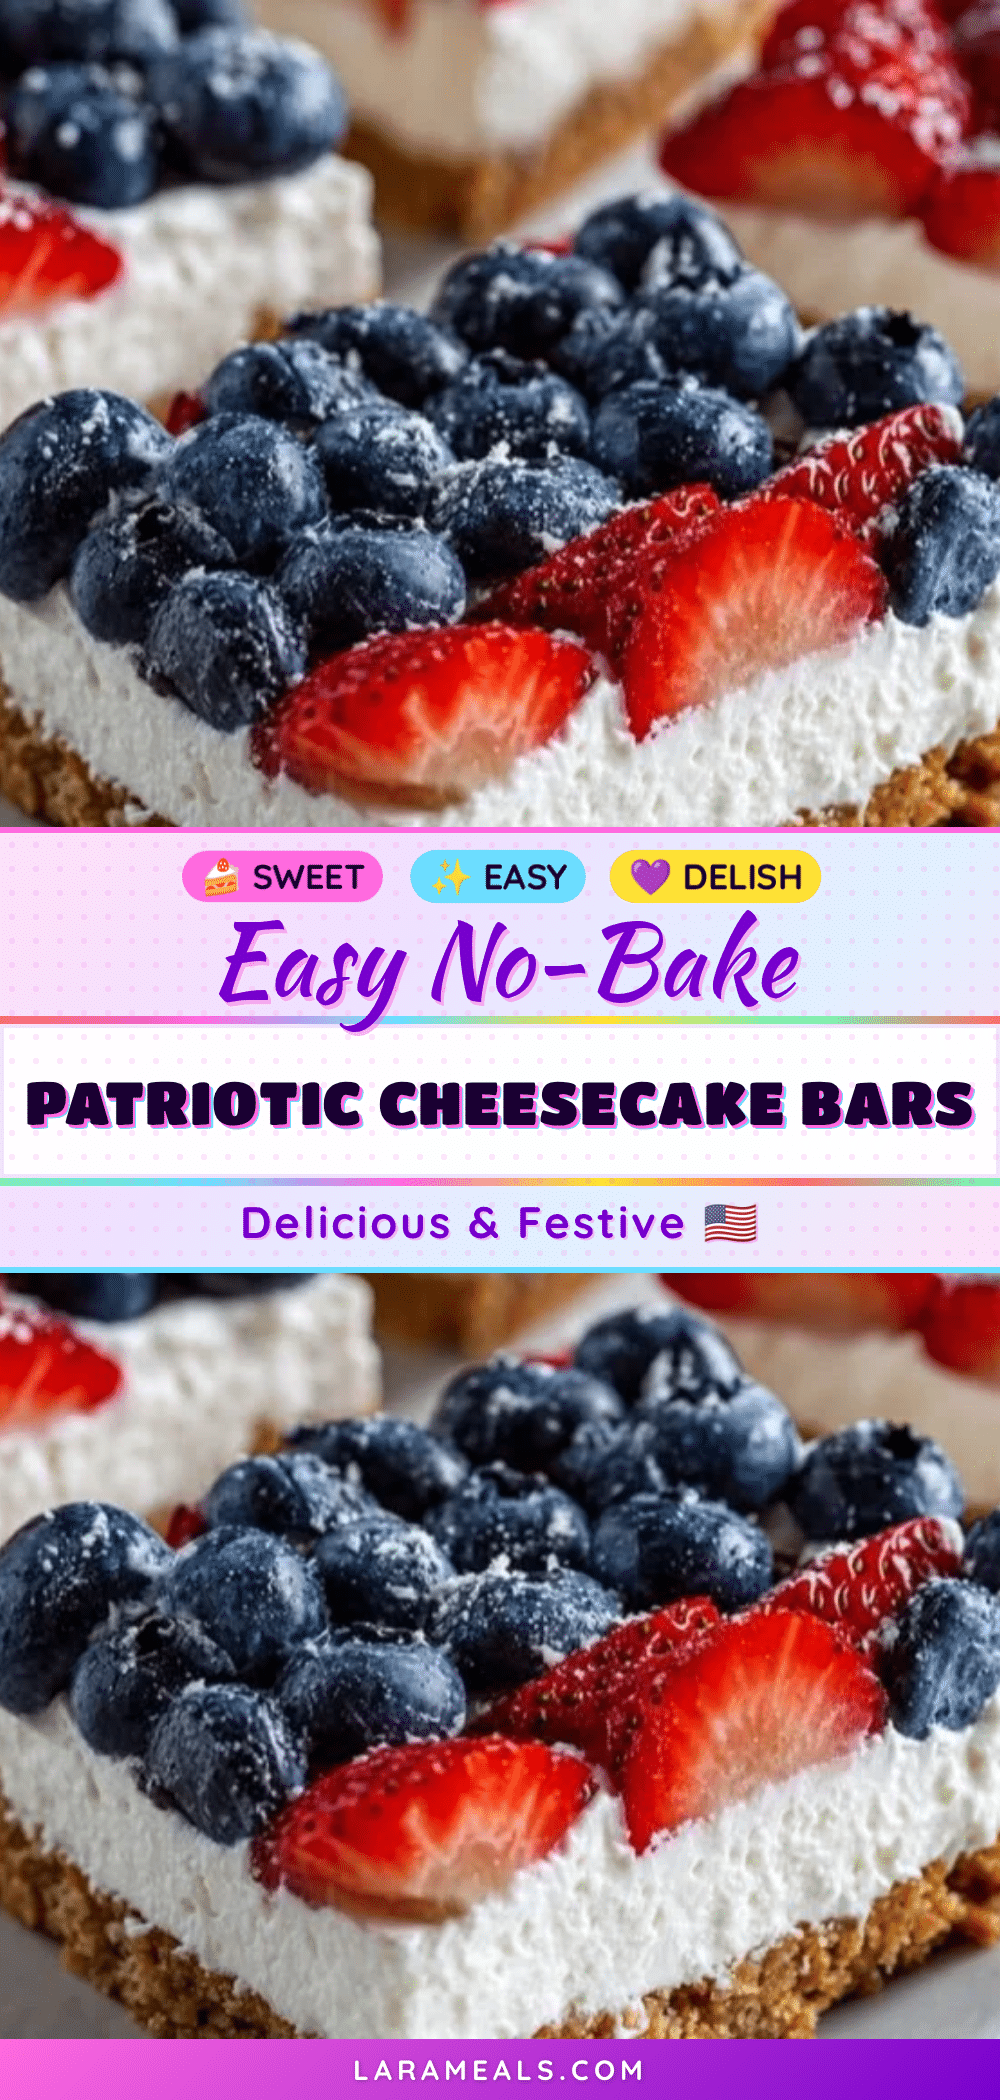
Easy No-Bake Flag Cheesecake Bars
A quick and festive no-bake cheesecake bar recipe featuring a creamy filling, buttery graham cracker crust, and fresh berries arranged in a patriotic flag pattern. Perfect for celebrations and backyard parties.
- Prep Time: 15 minutes
- Cook Time: 0 minutes
- Total Time: 4 hours 15 minutes
- Yield: 16 servings 1x
- Category: Dessert
- Cuisine: American
Ingredients
- 1 ½ cups graham cracker crumbs (about 10 full sheets, finely crushed)
- 6 tablespoons unsalted butter, melted
- 2 tablespoons granulated sugar
- 16 ounces (450g) cream cheese, softened (room temperature)
- 1 cup powdered sugar, sifted
- 1 teaspoon pure vanilla extract
- 1 cup heavy whipping cream, chilled
- 1 cup fresh strawberries, hulled and sliced thin
- 1 cup fresh blueberries
- Optional: small white star-shaped sprinkles or edible stars for garnish
Instructions
- Combine graham cracker crumbs, melted butter, and sugar in a bowl until mixture resembles wet sand and holds together when pressed.
- Press crust mixture firmly into the bottom of an 8×8 inch square pan, compacting tightly. Chill in refrigerator for at least 10 minutes.
- In a large bowl, beat cream cheese with powdered sugar and vanilla extract until silky smooth and lump-free (3-4 minutes on medium speed).
- In a separate chilled bowl, whip heavy cream until stiff peaks form (4-5 minutes).
- Gently fold whipped cream into cream cheese mixture in two additions, using a spatula to keep mixture light and airy.
- Pour half of the filling over the chilled crust and smooth with a spatula.
- Arrange sliced strawberries in horizontal stripes on top of the filling, leaving space in the corner for blueberries.
- Spoon remaining filling over the strawberries, leaving the corner uncovered.
- Fill the corner with whole fresh blueberries, pressing gently to keep them in place.
- Refrigerate for at least 4 hours or preferably overnight to set fully.
- Use a sharp knife warmed in hot water to slice bars cleanly. Serve chilled.
Notes
Use softened cream cheese at room temperature for smooth filling. Whip cream to stiff peaks but avoid overbeating. Chill bars overnight for best texture and clean slicing. Pat berries dry if very juicy to avoid sogginess. Parchment paper can be used to line pan for easy removal. For gluten-free, substitute graham crackers with gluten-free crumbs or nuts. Vegan versions possible with dairy-free cream cheese and coconut cream.
Nutrition
- Serving Size: 1 bar
- Calories: 280
- Sugar: 16
- Fat: 18
- Carbohydrates: 22
- Protein: 4
Keywords: no-bake cheesecake, flag cheesecake bars, patriotic dessert, easy cheesecake bars, no-bake dessert, Independence Day dessert, Fourth of July dessert


