Love this? Save it for later!
Share the inspiration with your friends
“Hey, have you ever tried sushi in a cup?” my friend texted me one busy Friday evening. Honestly, I was skeptical at first—sushi is usually such a delicate, artful thing, right? But that night, with the chaos of a long workweek still hanging over me, I needed something quick, satisfying, and a little bit fun. So I gave it a shot. What came out of the oven was this golden, crispy sushi cup that crackled in your mouth, bursting with fresh, vibrant flavors. It wasn’t just a snack; it was a little moment of joy that felt unexpected and easy, which, let’s face it, is sometimes all you need.
These crispy sushi cups became my go-to for casual dinners and impressing friends with zero fuss. They’re like sushi got an upgrade—crunchy where it counts, fresh where it matters, and perfectly portioned for a bite-sized delight. The first time I made them, my partner kept asking for “just one more,” and honestly, I couldn’t blame them. The mix of textures—the crispy shell with silky avocado, the zing of pickled ginger, and a touch of wasabi mayo—kept me coming back all week long.
It’s funny how sometimes the best recipes come from a little twist on something familiar. These sushi cups feel special, but you don’t need a sushi chef’s skills or fancy ingredients to pull them off. They’re the kind of recipe that sticks with you because they’re fresh, flavorful, and easy enough to whip up on a whim, even when your kitchen looks like a disaster zone. Plus, the crispy rice base adds this unexpected crunch that turns sushi into a whole new experience. I guess that’s why this recipe has stuck around in my regular rotation—it’s reliable, satisfying, and honestly, a bit addictive.
So, if you’re curious about a fresh and flavorful bite that’s a little different from your usual sushi night, this crispy sushi cups recipe might just surprise you like it did me. It’s simple, fun, and just the right kind of crispy.
Why You’ll Love This Recipe
After making these crispy sushi cups more times than I can count, I can say with confidence that they’re a winner for a lot of reasons. Here’s why I keep coming back to this easy homemade recipe:
- Quick & Easy: From start to finish, these sushi cups come together in about 30 minutes. Perfect for a busy weeknight or when you want a fresh bite without the fuss.
- Simple Ingredients: No need to hunt down exotic items. Most ingredients are pantry staples or easy to find at your local grocery store.
- Perfect for Entertaining: These bite-sized cups make a great appetizer for casual gatherings or potlucks. They’re easy to grab, share, and enjoy.
- Crowd-Pleaser: Kids, sushi lovers, and even those hesitant about raw fish tend to love the crispy texture and fresh toppings.
- Unbelievably Delicious: The balance between crunchy rice cups and silky avocado, combined with a punch of flavor from soy sauce and wasabi mayo, is honestly next-level comfort food.
This recipe isn’t just another sushi roll. The secret is in the crispy rice base—lightly pan-fried or baked to golden perfection—which adds a delightful crunch you don’t usually get in sushi. I like to blend a bit of toasted sesame oil into the rice to give it that nutty aroma that makes every bite pop.
Plus, making your own sushi cups feels like a mini kitchen adventure without needing a sushi knife or rolling mat. It’s a fun way to bring fresh flavors to your table without the long prep time. And if you’re curious about other crispy delights, you might appreciate the crispy ultimate BBQ chicken grilled cheese sandwich I’ve shared before—it’s all about that satisfying crunch paired with bold flavors!
What Ingredients You Will Need
This recipe uses simple, wholesome ingredients to deliver bold flavor and satisfying texture without the fuss. Most are pantry staples or easy swaps, so you won’t have to make a special trip to the store.
- Sushi Rice: Short-grain Japanese rice, cooked and seasoned with rice vinegar, sugar, and salt (this gives that classic sticky texture and subtle tang).
- Rice Vinegar: Essential for seasoning the rice; look for unseasoned or seasoned varieties based on your preference.
- Sugar and Salt: To balance the vinegar’s acidity in the rice.
- Toasted Sesame Oil: Adds a toasty, nutty aroma when mixed with the cooked rice—just a splash is plenty.
- Vegetable Oil or Neutral Oil: For frying or brushing the rice cups to get that beautiful crispiness.
- Nori Sheets: Cut into strips or small pieces to line the sushi cups or add as garnish (totally optional but adds flavor).
- Fresh Avocado: Ripe and sliced or cubed—this creamy element contrasts perfectly with the crispy rice.
- Cucumber: Thinly sliced or julienned for crunch and freshness.
- Carrot: Grated or cut into matchsticks for added texture and a pop of color.
- Imitation Crab or Cooked Shrimp: Easy seafood options that work well here (feel free to swap with smoked salmon or tofu cubes).
- Pickled Ginger: For that sweet and tangy bite that cleanses the palate.
- Wasabi Mayo: A mix of mayo and wasabi paste to drizzle on top — adds creamy heat.
- Soy Sauce or Tamari: For dipping or drizzling; tamari works great if you want gluten-free.
- Green Onions and Sesame Seeds: Fresh garnishes for color and crunch.
If you want to swap out ingredients, you can easily adapt this recipe. For instance, use almond flour for a gluten-free rice crust alternative or swap the mayo with vegan mayo to keep it plant-based. I personally like using Kikkoman soy sauce for that reliable balance of saltiness and umami.
Equipment Needed
- Mini Muffin Tin: Essential for shaping the crispy sushi cups. If you don’t have one, small ramekins can work but might need extra careful handling.
- Nonstick Skillet or Frying Pan: To crisp the rice cups evenly. A well-seasoned pan helps prevent sticking.
- Rice Cooker or Pot: For perfectly cooked sushi rice. I swear by my rice cooker for consistent results, but a heavy-bottomed pot works fine too.
- Mixing Bowls: For seasoning the rice and mixing toppings.
- Sharp Knife: To slice avocado, cucumber, and other fresh ingredients neatly.
- Spoon or Small Offset Spatula: For spreading rice evenly into the muffin tin cups.
For budget-friendly alternatives, you can use a cookie scoop to portion the rice into the tin instead of a spoon for less mess. Also, if you don’t have a mini muffin pan, muffin liners in a regular pan can help hold the shape, but the crispiness might vary.
Preparation Method
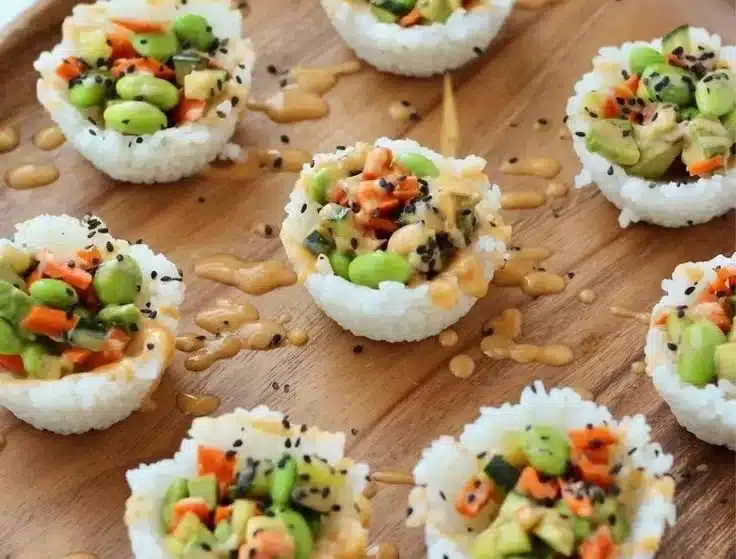
- Cook the Sushi Rice: Rinse 1 cup (180g) of sushi rice under cold water until the water runs clear. Cook with 1¼ cups (300ml) water in a rice cooker or pot. Once done, transfer to a large bowl.
- Season the Rice: Mix 3 tablespoons rice vinegar, 1 tablespoon sugar, and ½ teaspoon salt in a small bowl until dissolved. Gently fold this into the warm rice along with 1 teaspoon toasted sesame oil. Spread the rice out to cool slightly—this prevents it from getting mushy.
- Prepare Your Toppings: While the rice cools, slice 1 ripe avocado, julienne ½ cucumber, grate 1 small carrot, and chop 4 ounces (115g) imitation crab or cooked shrimp into bite-sized pieces.
- Form the Sushi Cups: Preheat your oven to 375°F (190°C). Lightly oil a mini muffin tin. Press about 2 tablespoons (30g) of the seasoned rice into each muffin cup, pushing up the sides to create a little bowl shape. The rice should be compact but not squashed.
- Crisp the Rice Cups: Brush the tops with a bit of vegetable oil. Bake for 15-20 minutes until the rice cups are golden and crispy at the edges. Alternatively, you can pan-fry them carefully in a nonstick skillet over medium heat, turning gently to crisp all sides (about 3-4 minutes per side).
- Assemble the Cups: Once cooled slightly, fill each cup with a bit of nori strip (if using), a slice of avocado, cucumber, carrot, and crab or shrimp. Drizzle with wasabi mayo (mix 2 tablespoons mayo with ½ teaspoon wasabi paste) and a few drops of soy sauce.
- Garnish & Serve: Sprinkle with sesame seeds and chopped green onions. Serve immediately for the best crunch and freshness.
Note: If your rice feels too dry or crumbly while forming cups, add a small splash of water and gently press again. The rice should hold together without falling apart. Also, don’t skip that sesame oil—it’s a small step that adds a big flavor boost.
Cooking Tips & Techniques
Getting the perfect crispy sushi cup takes a little finesse, but you’ll get there—I promise. Here are some tips I’ve picked up along the way:
- Cook Rice Just Right: Under or overcooked rice can ruin texture. Rinse thoroughly and use fresh water for cooking. Let it steam properly before seasoning.
- Don’t Skip the Oil: Brushing or lightly frying the rice cups with oil is key to that golden crunch. I learned this the hard way after a few bland batches.
- Press Rice Firmly: Compacting the rice into the muffin tin helps it hold its shape during cooking. But don’t press so hard the grains get mashed.
- Use Fresh Ingredients: Since the toppings are minimal, using ripe avocado and fresh veggies really makes the flavors pop.
- Work Quickly When Assembling: Once the cups are crispy, they can soften if left too long. Assemble right before serving for maximum crunch.
- Multitasking Hack: While the rice bakes, prep your toppings to save time. This keeps the momentum going and dinner on the table faster.
Honestly, the first few times I made these, I rushed pressing the rice or skipped brushing oil, and the cups weren’t as crispy or held together well. Patience and care pay off—especially with the rice prep and crisping stage.
Variations & Adaptations
This recipe is a great canvas, and I love mixing it up depending on the mood or what’s in my fridge. Here are some ways you can change it up:
- Vegetarian Version: Skip the seafood and load up on marinated tofu, avocado, and pickled vegetables. Drizzle with a spicy sriracha mayo instead of wasabi mayo.
- Spicy Tuna Cups: Use diced sushi-grade tuna mixed with spicy mayo for a classic kick. Add some crunchy tempura flakes on top for texture.
- Seasonal Veggie Cups: Swap cucumber and carrot for roasted sweet potato cubes or fresh mango slices for a sweet twist.
- Gluten-Free: Use tamari instead of soy sauce and double-check your mayo ingredients. The recipe is naturally gluten-free otherwise.
- Cooking Method: Instead of baking, you can pan-fry the rice cups in a nonstick skillet with a touch of oil for a quicker, hands-on method that yields an even crispier texture.
Once, I tried adding a drizzle of smoky charred shrimp marinade on top, and it gave the cups a bold, smoky note that was surprisingly good. Don’t be afraid to experiment!
Serving & Storage Suggestions
These crispy sushi cups shine best served fresh and warm when the rice is still crisp. Serve them as finger food at a party, or as a light appetizer before dinner.
Pair with a cold, crisp white wine or a refreshing iced green tea to balance the rich and tangy notes of the wasabi mayo and fresh toppings. For a casual meal, they go beautifully alongside a fresh avocado Caprese salad or a simple miso soup.
If you have leftovers (though rare!), store the rice cups separately from the toppings in airtight containers in the fridge for up to 24 hours. Reheat the rice cups in a toaster oven or skillet to bring back some crispiness before assembling again.
Flavors tend to mellow a bit after refrigeration, so I recommend eating these sushi cups right away for the best experience.
Nutritional Information & Benefits
A serving of these crispy sushi cups (about 4 cups) typically contains around 300-350 calories, depending on your choice of toppings. They offer a good balance of carbohydrates from the rice, healthy fats from avocado and sesame oil, and protein from seafood or tofu.
The sushi rice’s vinegar helps with digestion, and the fresh vegetables add fiber and vitamins. Avocado brings heart-healthy monounsaturated fats, while the wasabi mayo adds a little metabolism-boosting spice.
This recipe can easily fit into gluten-free or pescatarian diets with minor tweaks. Just watch out for any allergens like soy or shellfish, and substitute as needed to suit your dietary needs.
Conclusion
In a world of complicated sushi rolls and long prep times, these crispy sushi cups offer a fresh, flavorful bite that feels both special and surprisingly simple. They’re perfect for anyone craving sushi’s bright flavors with a fun crunch, without needing a sushi chef’s precision.
What I love most is how versatile they are—you can make them your own with different fillings, cooking methods, or toppings. Whether you’re hosting a casual get-together or just want a quick snack, these sushi cups deliver satisfaction every time.
Give this recipe a try, tweak it to your taste, and don’t be shy about sharing how you made it your own. I’d love to hear your take on this crispy bite of freshness!
FAQs about Crispy Sushi Cups
Can I use regular long-grain rice instead of sushi rice?
While you can, sushi rice is sticky and holds together better, which is crucial for forming the cups. Long-grain rice might be too dry or loose, making it harder to shape and crisp.
How do I keep the sushi cups crispy after assembling?
Assemble just before serving to maintain crispiness. If you prepare ahead, keep rice cups and toppings separate and reheat the cups before adding fresh ingredients.
Can I make these sushi cups vegan?
Absolutely! Swap seafood for marinated tofu or mushrooms, use vegan mayo, and keep the rest of the fresh veggies. The crispy rice base stays the same.
What’s the best way to crisp the rice cups?
Baking at 375°F (190°C) with a light oil brush works well, but pan-frying in a nonstick skillet gives an even crunchier texture if you keep a close eye to avoid burning.
Are these sushi cups safe to eat if I don’t use raw fish?
Yes, using cooked shrimp, imitation crab, or vegetarian fillings makes this recipe safe and accessible for everyone, especially if you’re wary of raw seafood.
Pin This Recipe!
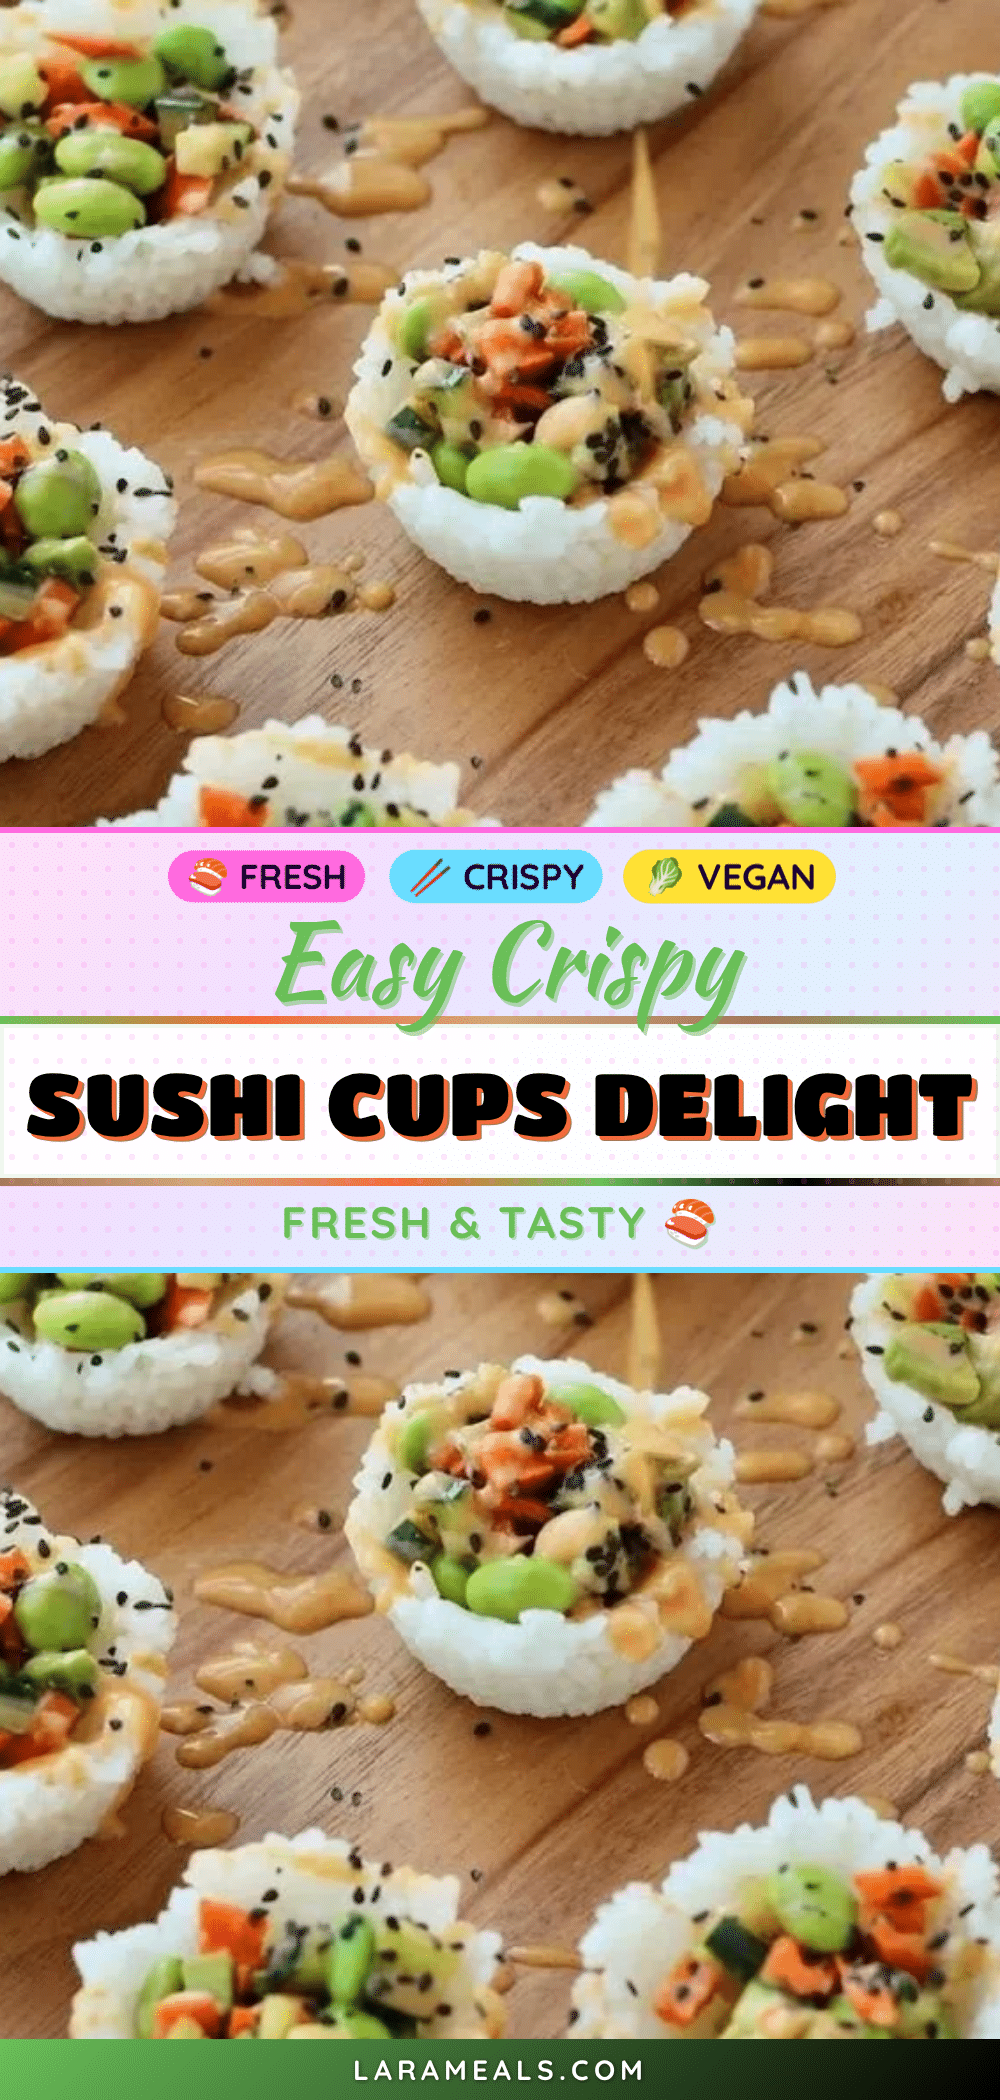
Crispy Sushi Cups Recipe Easy Homemade Fresh Flavorful Bites

These crispy sushi cups offer a quick, satisfying, and fun twist on traditional sushi with a crunchy rice base and fresh, vibrant toppings. Perfect for casual dinners or entertaining, they combine crispy texture with silky avocado and flavorful seafood or vegetarian options.
- Prep Time: 15 minutes
- Cook Time: 20 minutes
- Total Time: 35 minutes
- Yield: 12 sushi cups (about 4 servings) 1x
- Category: Appetizer
- Cuisine: Japanese
Ingredients
- 1 cup (180g) sushi rice
- 1¼ cups (300ml) water
- 3 tablespoons rice vinegar
- 1 tablespoon sugar
- ½ teaspoon salt
- 1 teaspoon toasted sesame oil
- Vegetable oil or neutral oil for frying or brushing
- Nori sheets, cut into strips or small pieces (optional)
- 1 ripe avocado, sliced or cubed
- ½ cucumber, thinly sliced or julienned
- 1 small carrot, grated or cut into matchsticks
- 4 ounces (115g) imitation crab or cooked shrimp (or smoked salmon or tofu cubes)
- Pickled ginger
- Wasabi mayo (2 tablespoons mayo mixed with ½ teaspoon wasabi paste)
- Soy sauce or tamari for dipping or drizzling
- Green onions, chopped
- Sesame seeds
Instructions
- Rinse 1 cup (180g) of sushi rice under cold water until the water runs clear. Cook with 1¼ cups (300ml) water in a rice cooker or pot. Once done, transfer to a large bowl.
- Mix 3 tablespoons rice vinegar, 1 tablespoon sugar, and ½ teaspoon salt in a small bowl until dissolved. Gently fold this into the warm rice along with 1 teaspoon toasted sesame oil. Spread the rice out to cool slightly to prevent mushiness.
- While the rice cools, slice 1 ripe avocado, julienne ½ cucumber, grate 1 small carrot, and chop 4 ounces (115g) imitation crab or cooked shrimp into bite-sized pieces.
- Preheat oven to 375°F (190°C). Lightly oil a mini muffin tin. Press about 2 tablespoons (30g) of the seasoned rice into each muffin cup, pushing up the sides to create a bowl shape. The rice should be compact but not squashed.
- Brush the tops with a bit of vegetable oil. Bake for 15-20 minutes until the rice cups are golden and crispy at the edges. Alternatively, pan-fry in a nonstick skillet over medium heat, turning gently to crisp all sides (about 3-4 minutes per side).
- Once cooled slightly, fill each cup with a bit of nori strip (if using), a slice of avocado, cucumber, carrot, and crab or shrimp. Drizzle with wasabi mayo and a few drops of soy sauce.
- Sprinkle with sesame seeds and chopped green onions. Serve immediately for best crunch and freshness.
Notes
If rice feels too dry or crumbly while forming cups, add a small splash of water and gently press again. Don’t skip the toasted sesame oil for added flavor. Assemble sushi cups just before serving to maintain crispiness. Leftover rice cups can be stored separately and reheated to restore crunch.
Nutrition
- Serving Size: About 3 sushi cups p
- Calories: 325
- Sugar: 3
- Sodium: 450
- Fat: 14
- Saturated Fat: 2
- Carbohydrates: 40
- Fiber: 4
- Protein: 8
Keywords: crispy sushi cups, sushi recipe, easy sushi, homemade sushi, appetizer, Japanese cuisine, sushi bites, fresh sushi, sushi with avocado, gluten-free sushi


