Love this? Save it for later!
Share the inspiration with your friends
“You’ve got to try these crispy cheesy roll ups,” my neighbor called out over the fence one afternoon, waving a plate that looked like golden little treasures. Honestly, I was skeptical at first—cheese and flaky crusts can be tricky, right? But curiosity got the better of me, and that very night I rolled up my sleeves. The smell of melting cheese mingling with baked pastry filled the kitchen, which honestly felt like an instant hug after a long day. The first bite was a surprise; that crispy, flaky golden crust gave way to a gooey, cheesy center that was just… wow.
What stuck with me was how these roll ups became my go-to quick snack, turning any random evening into a cozy little celebration. They’re not just any cheesy roll ups—they’re crispy, perfectly flaky, and packed with flavor that feels homemade yet special. No fuss, no complicated steps, just straightforward goodness that happens to impress anyone lucky enough to try them. This recipe quietly slid into my regular rotation, and now I can’t imagine snack time without them.
It’s funny how something so simple can feel like a small victory. There’s a comfort in the crunch and the oozing cheese that makes you close your eyes and savor the moment. These roll ups are exactly that kind of recipe—easy enough for a weeknight, yet special enough to share. The secret? A flaky golden crust that’s crispy in all the right ways and a cheesy filling that’s satisfyingly indulgent without being over the top.
Why You’ll Love This Recipe
Having tested and tweaked this recipe a handful of times (okay, more than a handful), I can honestly say these crispy cheesy roll ups are a keeper. Here’s why they’re so beloved in my kitchen:
- Quick & Easy: You can have these rolled, baked, and ready to enjoy in under 30 minutes—perfect when hunger strikes unexpectedly.
- Simple Ingredients: No need to hunt down fancy items; basic pantry staples and quality cheese are all you need.
- Perfect for Snacking or Parties: Whether it’s a casual afternoon snack or a last-minute potluck contribution, these roll ups fit right in.
- Crowd-Pleaser: Kids, adults, picky eaters—they all seem to agree these crunchy, cheesy bites are irresistible.
- Unbelievably Delicious: The contrast between the flaky crust and the creamy, melted cheese is seriously next-level comfort food.
What makes this recipe stand apart is the crust—flaky, golden, and crisp without being greasy or tough. Instead of just wrapping cheese in dough, this recipe teaches you a technique to get that perfect crust every time. Plus, the balance of cheeses brings out a rich flavor that’s not overly salty or sharp.
Honestly, after trying recipes like the crispy ultimate BBQ chicken grilled cheese sandwich, I thought I’d seen all the ways cheese and bread could come together. But these roll ups proved otherwise—with a flaky crust that’s uniquely satisfying.
It’s the kind of recipe that quietly makes you feel you’ve put in some effort, even when you haven’t. Comfort food you can trust to deliver every single time.
What Ingredients You Will Need
This recipe relies on a handful of straightforward, wholesome ingredients that come together to create bold flavors and a fantastic texture without any fuss. Most are pantry staples, which means you can whip these up pretty much anytime.
- Puff Pastry Sheets: 2 sheets (thawed if frozen) – This is the magic behind the flaky golden crust. I like using Pepperidge Farm for consistent results.
- Cheese Blend: 1 cup shredded mozzarella (for stretchiness), ½ cup sharp cheddar (for flavor kick), and ¼ cup grated Parmesan (for nuttiness) – Freshly shredded cheese melts best.
- Butter: 2 tablespoons unsalted, melted – Brushed on the dough edges to seal and help crisp.
- Garlic Powder: ½ teaspoon – Adds a subtle savory note.
- Dried Italian Herbs: 1 teaspoon (like oregano, basil, thyme) – For an herby background flavor.
- Salt: A pinch – Enhances all the other flavors.
- Egg Wash: 1 large egg beaten with 1 tablespoon water – Gives the crust its shiny golden color.
- Optional Extras: Finely chopped fresh parsley or chives for garnish; red pepper flakes for a bit of heat.
If fresh herbs aren’t around, dried ones work just fine. For a gluten-free option, try almond flour crust recipes, though the texture will differ. I’ve also swapped out the cheese blend for a mix of fontina and provolone, which adds a creamy depth, but sticking to mozzarella and cheddar keeps it classic and crowd-friendly.
Equipment Needed
- Baking Sheet: Standard 9×13 inch or larger – I like using a rimmed sheet to catch any drips.
- Parchment Paper or Silicone Baking Mat: Prevents sticking and makes cleanup easier.
- Rolling Pin: Helpful to gently roll out the puff pastry if it’s too thick or needs smoothing.
- Pastry Brush: For applying the egg wash and melted butter evenly.
- Sharp Knife or Pizza Cutter: To slice the roll ups cleanly before baking.
If you don’t have a pastry brush, a clean spoon or even your fingertips can do the job for butter and egg wash. A pizza cutter speeds up slicing and gives neat edges, but a sharp chef’s knife works just as well. Using parchment paper is a must in my book—it keeps the bottoms from sticking and helps get that flaky crust just right.
Preparation Method

- Preheat your oven to 400°F (200°C). Line your baking sheet with parchment paper for easy cleanup and to keep the roll ups from sticking.
- Prepare the puff pastry: Lightly flour your work surface and gently roll out each sheet just enough to smooth creases (about 12×12 inches or 30×30 cm). If the dough feels too warm and sticky, pop it in the fridge for 10 minutes before handling.
- Mix the cheese blend: In a bowl, combine shredded mozzarella, cheddar, and Parmesan. Toss in the garlic powder, dried Italian herbs, and a pinch of salt. Stir well to distribute flavors evenly.
- Cut the puff pastry sheets into rectangles: About 3×6 inches (7.5×15 cm) works well for bite-sized roll ups. You should get roughly 8 pieces per sheet.
- Brush the edges: Using melted butter, lightly brush the edges of each rectangle to help seal the roll up.
- Fill and roll: Place about 1½ tablespoons of the cheese mixture near one short edge of each pastry piece. Roll tightly but gently, sealing the edges with a bit more butter if needed.
- Arrange on baking sheet: Place the roll ups seam side down on the parchment-lined tray, leaving space between each for expansion.
- Apply egg wash: Brush the tops and sides of each roll up with the egg wash to get that signature shiny, golden finish.
- Bake: Pop the tray into the preheated oven and bake for 15–18 minutes. You’re looking for puffed-up, golden brown crusts with bubbly cheese peeking out.
- Cool slightly: Let the roll ups rest on the tray for 5 minutes before serving. This helps the cheese set a bit so it doesn’t ooze everywhere when you bite in.
If you notice the edges browning too fast, tent loosely with foil midway through baking. And if the cheese inside isn’t melting fully, a minute or two extra in the oven usually does the trick. The smell at this stage is honestly the best part—warm, cheesy, buttery goodness that makes any kitchen feel like home.
Cooking Tips & Techniques
One trick I learned the hard way is not to overfill the roll ups. Too much cheese and they ooze out messily, too little and you lose that melty center magic. Another tip: keep your butter melted but not hot when brushing on the edges, so it helps seal without making the dough soggy.
When working with puff pastry, cold dough is your friend. If it gets soft and sticky, chill for a bit before shaping. This keeps the layers intact, which means flakier crusts after baking.
Experimenting with the cheese mix was a fun adventure—adding a touch of Parmesan really boosted the flavor without overpowering the mozzarella’s stretch. I’ve also tried adding a sprinkle of smoked paprika inside for a subtle smoky undertone that pairs well if you like a little twist.
Timing is key. Bake too short and the crust stays doughy; too long and it gets dry. Watching the color closely and going by the puffiness and aroma are your best bets. Multitasking while baking is easy—clean up your prep mess or set the table while the oven does the work.
For consistent success, I always make sure my oven rack is in the center position to promote even browning. And if you want extra crunch, a light spray of cooking oil on top before baking can do wonders.
Variations & Adaptations
- Vegetarian twist: Add sautéed mushrooms or spinach to the cheese filling for extra flavor and earthiness.
- Spicy kick: Mix in jalapeño slices or a pinch of crushed red pepper flakes with the cheese blend for those who like heat.
- Herb-infused: Fresh basil or thyme finely chopped and mixed into the cheese adds a fragrant note that brightens the roll ups.
If you prefer baking instead of frying, this recipe is already oven-friendly, but you can also pan-fry the roll ups in a bit of butter for a golden crust with a slightly different texture. For dairy-free options, swap the cheese for plant-based alternatives and use a vegan puff pastry—just keep in mind the flavor and melt may vary.
I once made a batch with a hint of sun-dried tomato pesto inside, which gave a tangy surprise that paired beautifully with the buttery crust. It’s fun to experiment but keeping it simple with the classic cheese combo is always a win.
Serving & Storage Suggestions
These roll ups are best served warm, right out of the oven when the cheese is melty and the crust is at peak crispiness. They make a fantastic finger food for gatherings or a cozy snack with a cup of tea or your favorite cold drink.
Pair them with a fresh side salad or even a bowl of tomato soup for a comforting meal. If you enjoyed the creamy shrimp and grits from that recipe, these roll ups can be a tasty starter or snack alongside.
For leftovers, store roll ups in an airtight container in the refrigerator for up to 3 days. To reheat, pop them in a 350°F (175°C) oven for 8–10 minutes to bring back the crisp crust and warm filling. Avoid microwaving if you want to keep them crispy.
Flavors tend to mellow and blend after resting, so sometimes I find they actually taste better the next day—just make sure to reheat properly to keep that flaky texture.
Nutritional Information & Benefits
Each crispy cheesy roll up contains approximately 150–180 calories depending on size, with a satisfying balance of protein and fat from the cheese and butter. The puff pastry provides carbs, giving you quick energy, while the cheese offers calcium and some vitamin A.
While not a low-calorie snack, these roll ups are a great occasional treat that hits the comfort food spot without overdoing portion size. Using quality cheeses can boost the protein content, and the herbs add antioxidants and flavor without extra calories.
If you’re mindful of gluten, swapping puff pastry for gluten-free dough options is an easy fix. For those watching sodium, selecting low-salt cheese varieties helps keep it in check. Overall, this recipe strikes a nice balance between indulgence and simplicity.
Conclusion
Crispy cheesy roll ups with a flaky golden crust are the kind of recipe that feels like a small celebration anytime you make them. They’re straightforward, delicious, and versatile—a snack that’s just as welcome on a lazy evening as at a lively get-together. I love how easily they come together and how reliably they deliver that perfect crunch and gooey cheese combo.
Whether you stick to the classic cheese blend or try out one of the variations, these roll ups are your ticket to quick, satisfying bites that impress without stress. Give them a try, tweak the fillings to your taste, and see how they become a favorite in your kitchen like they did in mine.
Got your own twist on these roll ups or questions about the recipe? Drop a comment below—I’d love to hear how you make them your own!
FAQs
- Can I prepare these roll ups ahead of time?
Yes! You can assemble them and refrigerate for up to 24 hours before baking. Just bring them to room temperature before popping into the oven. - What’s the best cheese for melting in these roll ups?
Mozzarella is ideal for stretch and melt, combined with a sharper cheese like cheddar for flavor depth. - Can I freeze the roll ups?
Absolutely. Freeze unbaked roll ups on a tray, then transfer to a freezer bag. Bake directly from frozen but add a few extra minutes to the cooking time. - How do I get the crust extra flaky?
Keep the puff pastry cold until right before baking, and avoid overworking the dough. Brushing with egg wash helps give that beautiful golden finish. - Are there variations for those who don’t eat dairy?
Yes, you can use vegan cheese alternatives and dairy-free puff pastry for a tasty dairy-free option, though texture and flavor will vary slightly.
Pin This Recipe!
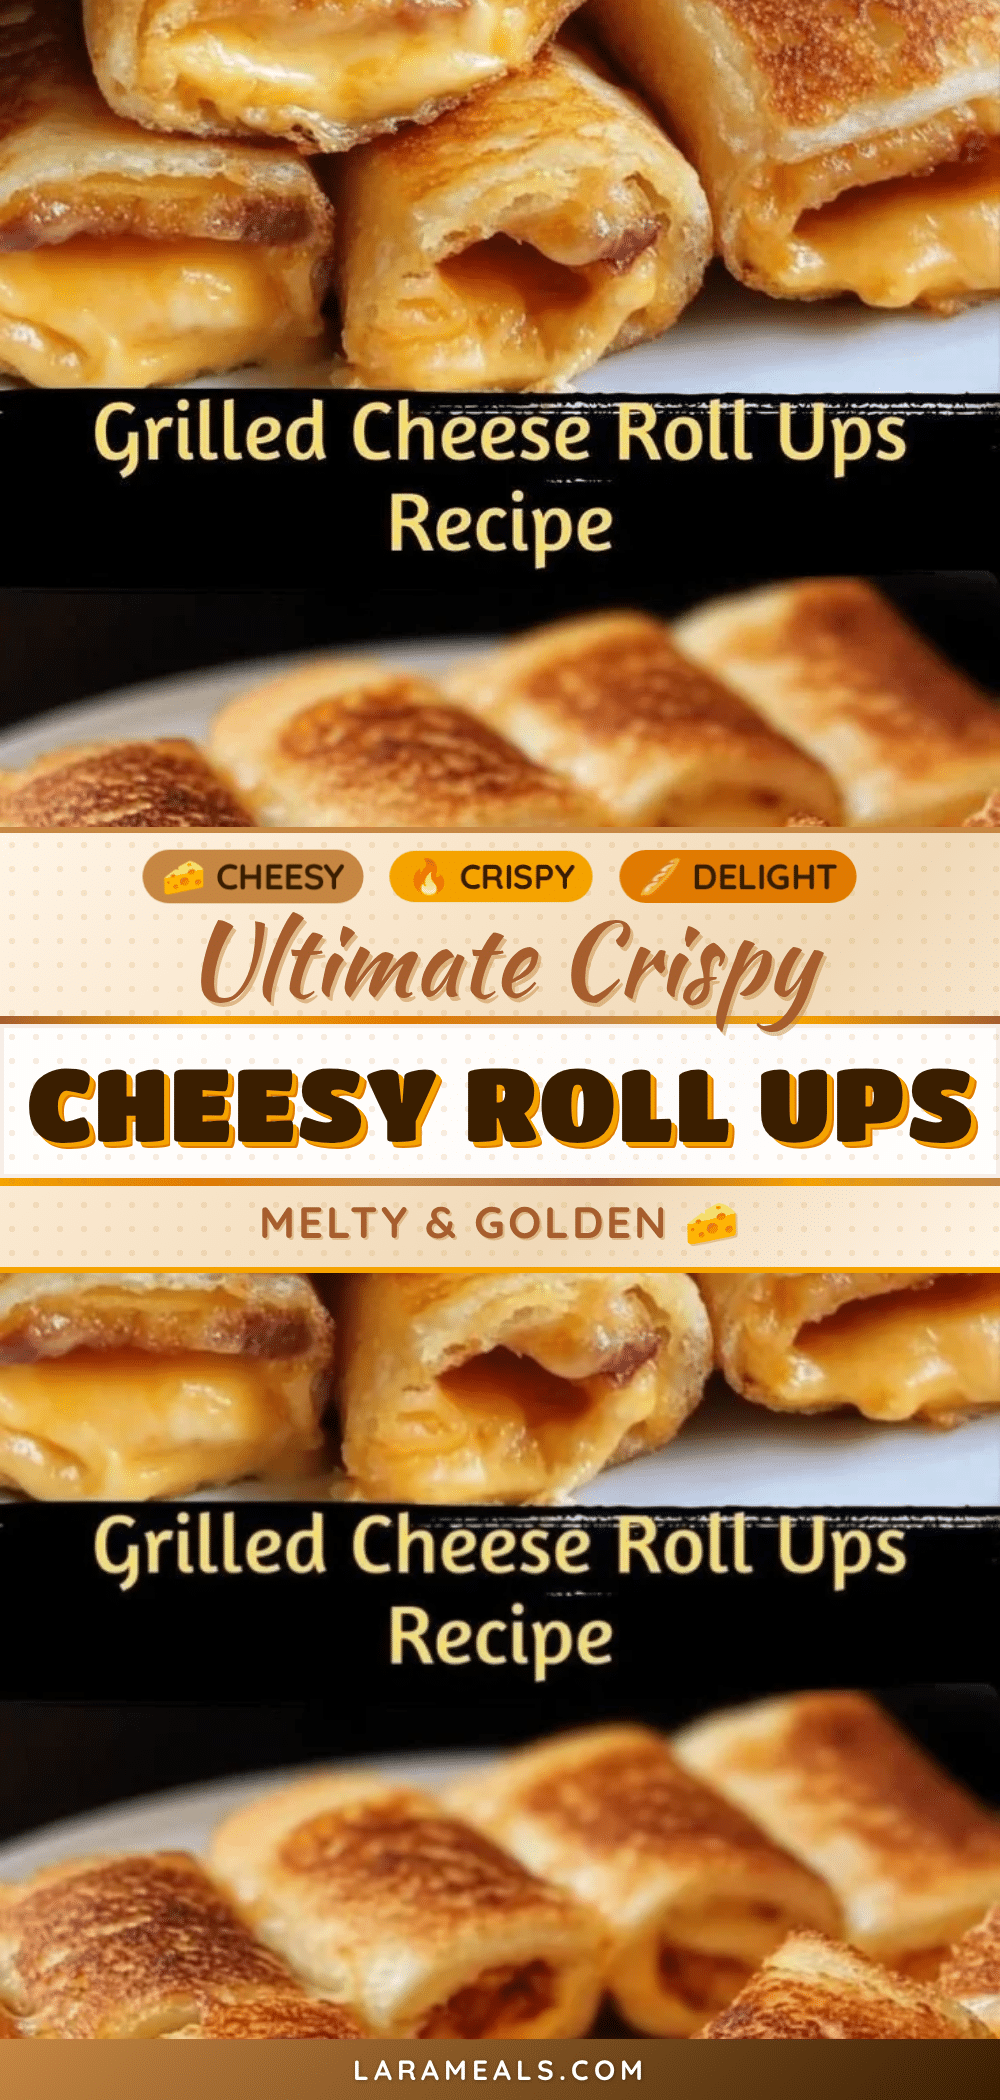
Crispy Cheesy Roll Ups

These crispy cheesy roll ups feature a flaky golden crust with a gooey, cheesy center, making them an easy and delicious homemade snack perfect for any occasion.
- Prep Time: 10 minutes
- Cook Time: 15-18 minutes
- Total Time: 25-28 minutes
- Yield: 16 roll ups (about 8 servings) 1x
- Category: Snack
- Cuisine: American
Ingredients
- 2 sheets puff pastry (thawed if frozen)
- 1 cup shredded mozzarella cheese
- 1/2 cup shredded sharp cheddar cheese
- 1/4 cup grated Parmesan cheese
- 2 tablespoons unsalted butter, melted
- 1/2 teaspoon garlic powder
- 1 teaspoon dried Italian herbs (oregano, basil, thyme)
- Pinch of salt
- 1 large egg beaten with 1 tablespoon water (egg wash)
- Optional: finely chopped fresh parsley or chives for garnish
- Optional: red pepper flakes for heat
Instructions
- Preheat oven to 400°F (200°C). Line a baking sheet with parchment paper.
- Lightly flour work surface and gently roll out each puff pastry sheet to smooth creases (about 12×12 inches). Chill dough for 10 minutes if too warm or sticky.
- In a bowl, combine mozzarella, cheddar, Parmesan, garlic powder, dried Italian herbs, and salt. Mix well.
- Cut puff pastry sheets into rectangles about 3×6 inches each, yielding roughly 8 pieces per sheet.
- Brush edges of each rectangle lightly with melted butter to help seal.
- Place about 1½ tablespoons of cheese mixture near one short edge of each pastry piece. Roll tightly and gently, sealing edges with more butter if needed.
- Arrange roll ups seam side down on the prepared baking sheet, spacing them apart.
- Brush tops and sides of each roll up with the egg wash for a shiny golden finish.
- Bake for 15–18 minutes until puffed, golden brown, and cheese is bubbly.
- Let roll ups cool on the tray for 5 minutes before serving to allow cheese to set.
Notes
Do not overfill the roll ups to prevent cheese from oozing out. Keep butter melted but not hot when brushing edges to avoid soggy dough. Chill puff pastry if it becomes too soft or sticky. Tent with foil if edges brown too fast. For extra crunch, lightly spray cooking oil on top before baking. Store leftovers in an airtight container in the refrigerator for up to 3 days and reheat in a 350°F oven for 8–10 minutes to maintain crispiness. Avoid microwaving to keep crust flaky.
Nutrition
- Serving Size: 2 roll ups
- Calories: 165
- Sugar: 1
- Sodium: 230
- Fat: 11
- Saturated Fat: 6
- Carbohydrates: 12
- Fiber: 0.5
- Protein: 7
Keywords: crispy cheesy roll ups, snack recipe, puff pastry snack, easy cheesy roll ups, homemade snack, flaky crust, party appetizer


