Love this? Save it for later!
Share the inspiration with your friends
“You really think this bread will turn out? It looks too simple to be good,” my friend joked as I was mixing the dough one chilly afternoon. Honestly, I had my doubts too—Amish white bread always sounded like one of those recipes that might require some secret skill or fancy ingredients. But that day, all I wanted was something comforting, a loaf that would warm the kitchen and feel like a hug in bread form.
That afternoon, the smell of yeast blossoming in the warm kitchen, the soft kneading between my hands, and the slow rise by the window reminded me how much I crave simple, honest food. The crust came out soft and light, not hard or crusty like some breads, with a fluffiness inside that made me close my eyes on the first bite. It was just dough, flour, sugar, and a little patience, yet this homemade Amish white bread became my go-to for cozy mornings and late-night sandwiches alike.
I found myself baking it repeatedly that week, sometimes swapping the butter for a touch of honey, other times using it to sop up a bowl of slow-cooker chicken and dumplings. It’s the kind of loaf that doesn’t show off but earns its place on your table, the kind of bread that feels like home even when you’re miles away. So, here’s the story and the recipe for the cozy homemade Amish white bread with a soft, fluffy crust that might just surprise you too.
Why You’ll Love This Amish White Bread Recipe
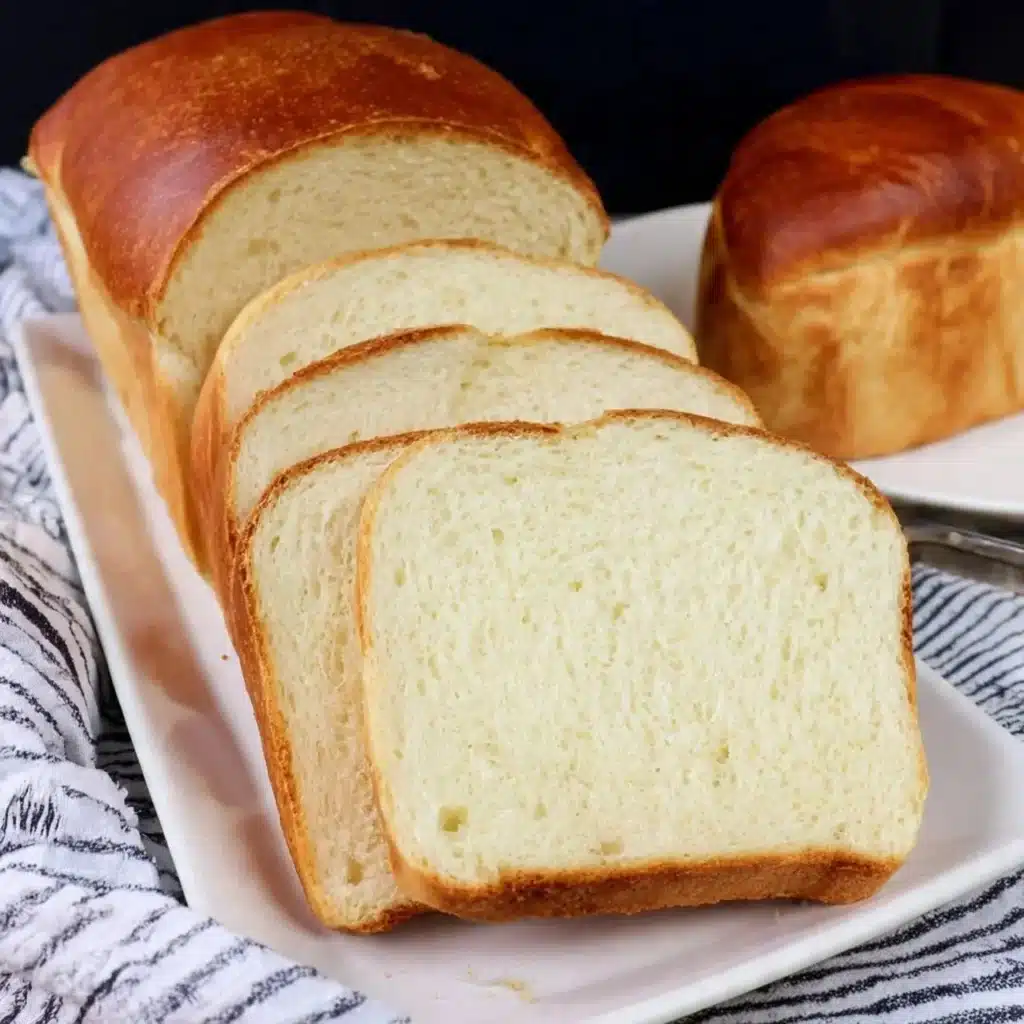
After perfecting this Amish white bread recipe through several trials, I can say it’s one of those rare bakes that balances simplicity and comfort with impressive results. It’s not just any white bread—this one has a soft, fluffy crust that makes every bite melt in your mouth.
- Quick & Easy: It comes together with straightforward steps and rises beautifully in just a couple of hours, perfect for busy days when you want fresh bread without fuss.
- Simple Ingredients: No exotic items here—just pantry staples like flour, yeast, sugar, and butter. You probably already have everything on hand!
- Perfect for Cozy Occasions: Whether it’s a slow Sunday breakfast or an impromptu dinner with friends, this bread fits right in.
- Crowd-Pleaser: Kids and adults alike have asked me for the recipe after tasting this loaf. It’s soft enough for little ones and hearty enough for adults.
- Unbelievably Delicious: The soft crust is different from the usual hard crust bread, making it uniquely tender and comforting without sacrificing texture.
What sets this Amish white bread apart is the gentle kneading and the careful rise, which creates that signature soft, fluffy crust instead of a tough one. It’s the kind of bread that invites you to slow down and savor small moments—the kind of recipe that’s as much about the process as the result.
Honestly, after trying this, I rarely reach for store-bought bread anymore. It’s just better fresh, and it brings back those quiet, cozy afternoons when baking was a way to unwind. If you want to experience a new favorite bread that feels like a little comfort wrapped in flour and warmth, this recipe’s got you covered.
What Ingredients You Will Need
This recipe uses simple, wholesome ingredients that combine to create a delightfully soft and fluffy loaf. Nothing fancy or hard to find—just good basics that work together for the perfect texture and flavor. If you’ve got a well-stocked pantry, you already have most of what you need.
- All-purpose flour (about 4 cups / 480 g): The base for the bread. I like using King Arthur for consistent texture, but any good-quality flour will do.
- Active dry yeast (2 1/4 teaspoons or one packet): The magic that makes the bread rise. Fresh yeast works too if you prefer.
- Warm water (1 1/2 cups / 360 ml, around 110°F/43°C): Activates the yeast. Too hot and you’ll kill it, too cold and it won’t wake up properly.
- Granulated sugar (2 tablespoons): Feeds the yeast and adds a hint of sweetness that balances the bread’s flavor.
- Salt (1 1/2 teaspoons): Enhances the dough’s flavor—don’t skip it!
- Unsalted butter (3 tablespoons, softened): Adds richness and helps keep the crust soft. You can swap with dairy-free margarine if needed.
- Milk (1/2 cup / 120 ml, warm): Contributes to the soft crumb and tender crust. Use any milk you like, dairy or plant-based.
- Egg (1 large, room temperature): Gives the bread a lovely golden color and a bit more structure.
If you want to try a gluten-free version, swapping the all-purpose flour for a gluten-free blend with xanthan gum can work, but the texture will be a bit different. For those who prefer less sugar, you can reduce it slightly, but keep in mind it helps the yeast do its job well.
Equipment Needed
- Large mixing bowl: For combining ingredients and giving the dough room to rise.
- Measuring cups and spoons: Accuracy helps here, especially with yeast and salt.
- Wooden spoon or dough whisk: For mixing before kneading by hand or with a stand mixer.
- Stand mixer with dough hook (optional): Makes kneading easier and faster if you have one. I found kneading by hand gives a better feel for the dough, though.
- Loaf pan (9 x 5 inches / 23 x 13 cm): For shaping the bread and giving it that classic Amish loaf shape.
- Kitchen towel or plastic wrap: To cover the dough during rising and keep it cozy.
- Oven thermometer (optional): Helpful for checking your oven’s temperature to avoid over- or under-baking.
If you don’t have a loaf pan, you can bake the dough freeform on a baking sheet—just expect a wider, flatter loaf. For budget-friendly options, a glass or ceramic baking dish works just fine too. Keeping your equipment clean and dry is key, especially when working with yeast dough.
Preparation Method
- Activate the yeast (10 minutes): In your large mixing bowl, combine the warm water (110°F/43°C), sugar, and yeast. Stir gently and let it sit until foamy and bubbly on top—that means the yeast is alive and kicking.
- Mix the wet ingredients (5 minutes): Add the softened butter, warm milk, and beaten egg to the yeast mixture. Stir to combine everything evenly.
- Add dry ingredients and form dough (10 minutes): Gradually add 3 1/2 cups (420 g) of the flour and salt to the wet mixture. Stir until the dough starts to come together. Then, turn it out onto a floured surface and knead by hand for about 8-10 minutes, adding the remaining flour as needed. The dough should be soft but not sticky—think smooth and slightly tacky to the touch.
- First rise (1 to 1 1/2 hours): Form the dough into a ball and place it in a lightly greased bowl. Cover with a kitchen towel or plastic wrap and let it rise in a warm spot until it doubles in size. The dough should feel airy and look puffed up—if it doesn’t rise, your yeast might have been too old or the water temperature off.
- Shape the loaf (5 minutes): Punch down the dough gently to release air bubbles. Turn it out onto a floured surface and shape it into a tight loaf that fits your pan. Place it seam-side down in the greased loaf pan.
- Second rise (45 minutes to 1 hour): Cover the pan loosely and let the dough rise again until it’s about 1 inch (2.5 cm) above the pan’s rim. This step helps create a soft crust.
- Preheat and bake (35-40 minutes): Preheat your oven to 350°F (175°C). Bake the bread for 35 to 40 minutes, or until the top is golden and the loaf sounds hollow when tapped. If the crust browns too fast, tent it with foil halfway through.
- Cool before slicing (1 hour): Remove the bread from the pan and cool on a wire rack. I know it’s tempting to slice right away, but letting it cool fully prevents the crumb from getting gummy.
If your dough feels sticky during kneading, sprinkle a little more flour in small amounts—too much flour can make the bread dense, so take it slow. Also, don’t rush the rising times; patience makes all the difference in that soft, fluffy crust.
Cooking Tips & Techniques
One little trick I learned is to use warm, not hot, liquids when activating the yeast—about 110°F (43°C) is perfect. Too hot and the yeast dies; too cold and it won’t activate properly. I usually test the water with my finger to keep it comfortable, like a warm bath.
Kneading might seem intimidating, but it’s just about building gluten for texture. I find kneading by hand connects me to the dough; you can feel when it’s ready by how it bounces back gently when poked. Over-kneading can make the bread tough, so around 8-10 minutes is just right.
Covering the dough during rising with a damp kitchen towel keeps it from drying out. I’ve made the mistake of letting it rise uncovered once—ended up with a crusty, cracked dough top that didn’t bake evenly.
Another tip: tent the loaf with foil if the crust browns too fast, especially in ovens that run hot. That soft crust is the signature of Amish white bread, and you want to keep it tender, not too crunchy.
Lastly, cooling completely before slicing is a must. I’ve learned that slicing too soon results in a gummy crumb that’s disappointing after all that work. I usually time my baking so the bread cools while I prep the rest of the meal, often alongside a hearty BBQ chicken grilled cheese sandwich for a perfect pairing.
Variations & Adaptations
While this Amish white bread is wonderful as is, I’ve played around with a few tweaks to suit different tastes and needs.
- Honey-Sweetened: Swap the sugar for 2 tablespoons of honey for a slightly richer, naturally sweet flavor. It also softens the crust a bit more.
- Whole Wheat Blend: Replace up to half the all-purpose flour with whole wheat for a nuttier taste and extra fiber. You might need a splash more water as whole wheat absorbs more moisture.
- Dairy-Free Version: Use coconut or almond milk instead of regular milk and dairy-free butter. The bread stays just as soft, with a subtle nutty undertone.
- Herb-Infused: Add 1 tablespoon of dried herbs like rosemary or thyme to the dry ingredients for a savory twist that pairs beautifully with soups and stews.
- Gluten-Free: Use a gluten-free flour blend with xanthan gum. The texture won’t be quite the same, but it’s a good option for gluten sensitivities.
For a different baking method, you can shape the dough into rolls instead of a loaf and bake on a sheet pan for about 20 minutes. I once made these rolls to go with creamy shrimp and grits, and the soft bread was perfect for soaking up the sauce.
Serving & Storage Suggestions
This Amish white bread shines best when served fresh and slightly warm. Toasted with butter or layered with jam, it’s a simple pleasure that feels like a small celebration. For sandwiches, its soft crust keeps things neat, making it ideal for both kids’ lunches and grown-up snacks.
Pair it with creamy soups, hearty stews, or even a rich classic cheesecake dessert to round out a cozy meal. The neutral flavor makes it incredibly versatile.
To store, wrap the cooled loaf tightly in plastic wrap or place in an airtight container. It stays fresh at room temperature for 2-3 days. For longer storage, slice and freeze in a zip-top bag for up to 3 months. When you want a slice, just toast it directly from frozen or let it thaw at room temperature.
Reheating in the oven at 300°F (150°C) for 10 minutes brings back that fresh-baked warmth and soft crust, almost like it just came out of the oven. Over time, the bread’s flavor deepens, making it even better for toast the next day.
Nutritional Information & Benefits
This homemade Amish white bread offers a straightforward nutrition profile, with approximately 120-140 calories per slice (about 1/12th of the loaf). It provides moderate carbohydrates, a small amount of protein, and minimal fat from the butter and egg.
Key benefits come from using simple, recognizable ingredients without preservatives or additives found in store-bought bread. The inclusion of milk and egg adds a bit of calcium and protein, making it more nourishing than basic white bread. For those watching carbs, using whole wheat flour or a blend can boost fiber content.
Keep in mind, this bread contains gluten, dairy, and eggs, so it’s not suitable for those with related allergies. However, the dairy-free and gluten-free variations mentioned can make it accessible to many dietary needs.
Conclusion
This cozy homemade Amish white bread with its soft, fluffy crust is one of those recipes that quietly earns a permanent spot in your kitchen routine. It’s straightforward enough for everyday baking but delivers a comfort and texture that feels special. I love how it invites you to slow down, enjoy the process, and savor every bite.
Feel free to tailor it to your tastes—whether with a touch of honey, herbs, or whole wheat flour—and make it your own. Baking this bread has been a small ritual of comfort for me, especially on days when a little softness and warmth are all you need.
If you give it a try, I’d love to hear how it turns out or what variations you come up with. There’s something about sharing these simple recipes that makes every loaf feel like a community effort. Here’s to fresh bread and cozy kitchens—happy baking!
Frequently Asked Questions About Amish White Bread
Can I use instant yeast instead of active dry yeast?
Yes, you can substitute instant yeast. Use about 2 teaspoons and add it directly to the dry ingredients without proofing in water first.
How do I know when the dough has risen enough?
The dough should roughly double in size and look puffed and airy. A good test is to gently press your finger into the dough—if the indentation stays, it’s ready.
Why is my bread crust hard instead of soft?
Hard crust usually means the oven was too hot or the bread baked too long uncovered. Covering with foil halfway through baking or lowering the temperature slightly can help keep it soft.
Can I make this bread without a stand mixer?
Absolutely! Kneading by hand is traditional and gives you great control over the dough’s texture. Just be prepared to knead for about 8-10 minutes until smooth.
How should I store leftover Amish white bread?
Wrap it tightly in plastic wrap or keep in an airtight container at room temperature for up to 3 days. For longer storage, slice and freeze it—toast or warm slices straight from the freezer when needed.
Pin This Recipe!

Amish White Bread Recipe Easy Homemade Soft Fluffy Crust
A cozy homemade Amish white bread with a soft, fluffy crust that is simple to make with pantry staples and perfect for comforting meals.
- Prep Time: 20 minutes
- Cook Time: 35-40 minutes
- Total Time: 3 hours
- Yield: 12 servings (slices) 1x
- Category: Bread
- Cuisine: American
Ingredients
- 4 cups (480 g) all-purpose flour
- 2 1/4 teaspoons active dry yeast (one packet)
- 1 1/2 cups (360 ml) warm water (about 110°F/43°C)
- 2 tablespoons granulated sugar
- 1 1/2 teaspoons salt
- 3 tablespoons unsalted butter, softened
- 1/2 cup (120 ml) warm milk
- 1 large egg, room temperature
Instructions
- Activate the yeast: In a large mixing bowl, combine warm water (110°F/43°C), sugar, and yeast. Stir gently and let sit until foamy and bubbly, about 10 minutes.
- Mix the wet ingredients: Add softened butter, warm milk, and beaten egg to the yeast mixture. Stir to combine evenly, about 5 minutes.
- Add dry ingredients and form dough: Gradually add 3 1/2 cups (420 g) of flour and salt to the wet mixture. Stir until dough starts to come together. Turn out onto a floured surface and knead by hand for 8-10 minutes, adding remaining flour as needed until dough is soft but not sticky.
- First rise: Form dough into a ball and place in a lightly greased bowl. Cover with kitchen towel or plastic wrap and let rise in a warm spot until doubled in size, about 1 to 1 1/2 hours.
- Shape the loaf: Punch down dough gently to release air bubbles. Turn out onto floured surface and shape into a tight loaf that fits a 9×5 inch loaf pan. Place seam-side down in greased pan.
- Second rise: Cover pan loosely and let dough rise until about 1 inch above pan rim, about 45 minutes to 1 hour.
- Preheat oven to 350°F (175°C). Bake bread for 35-40 minutes until top is golden and loaf sounds hollow when tapped. Tent with foil halfway through if crust browns too fast.
- Cool before slicing: Remove bread from pan and cool on wire rack for about 1 hour before slicing to prevent gummy crumb.
Notes
Use warm (not hot) liquids at about 110°F to activate yeast properly. Knead dough by hand for best texture, about 8-10 minutes. Cover dough during rising to prevent drying out. Tent bread with foil if crust browns too fast. Cool completely before slicing to avoid gummy crumb. Variations include honey instead of sugar, whole wheat flour substitution, dairy-free milk and butter, herb additions, and gluten-free flour blends.
Nutrition
- Serving Size: 1 slice (1/12th of l
- Calories: 130
- Sugar: 2
- Sodium: 220
- Fat: 3
- Saturated Fat: 1.5
- Carbohydrates: 23
- Fiber: 1
- Protein: 4
Keywords: Amish white bread, homemade bread, soft crust bread, easy bread recipe, fluffy bread, yeast bread


